A Complete Guideline to Creating a Modern React App With TypeScript From Scratch
Going inside any framework has two benefits. It makes you a better developer and improves your understanding of the job that you are doing.
It also helps you appreciate the things that these frameworks do under the hood that we take for granted.
I wanted to go deep inside React to see how an application really works under the hood by replicating it locally.
Today, I will take you with me on this journey. I will try to keep the concepts beginner-friendly for you. You don’t need to code with me. But if you do, that will be awesome!
Let’s begin.
UPDATE (November 27, 2021)
I have updated the article with the latest version of the webpack. which is currently on 5.64.4 and webpack-cli is on 4.9.1 .
Initialize a Project
First, create an empty folder anywhere on your machine.
mkdir react-from-scratchInitialize the Project With Yarn
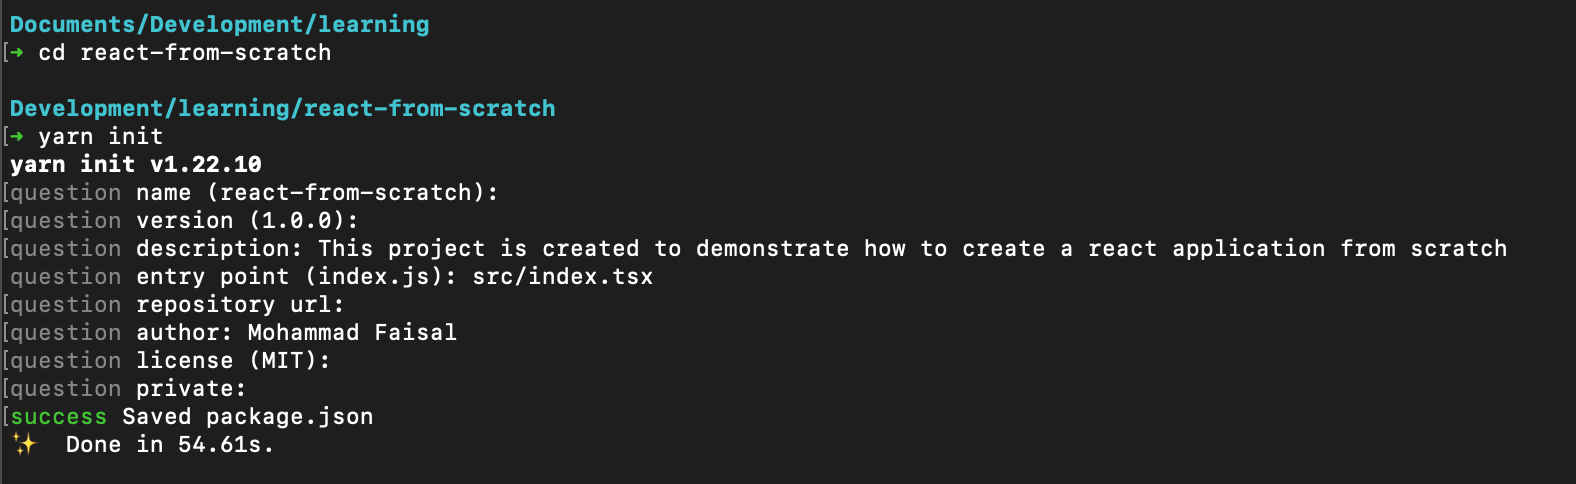
Then initialize an npm project by running the following command (yarn recommended).
yarn init

or

npm init
Here is what my output looks like with yarn.
Primary Setup
Then we will create two folders. src is to keep our project files, and build will be used to keep the bundle files (we get these after building the project).
mkdir src buildInside the src folder, create a index.html file. This is the only HTML file inside our project. This is why our application will be called a single-page application (SPA).
cd src
touch index.html
The contents of our index.html are as follows:
<!DOCTYPE html>
<html lang="en">
  <head>
      <meta charset="UTF-8">
      <meta http-equiv="X-UA-Compatible" content="IE=edge">
      <meta name="viewport" content="width=device-width, initial-scale=1.0">
      <title>React From Scratch</title>
  </head>

  <body>
      <div id="root"></div>
  </body>
</html>
The only thing to notice is the div tag with the id="root" . This is the div that our application will connect later.
Install React
Okay, now we will install React and ReactDOM as a dependency because it will be very hard to create a React application without the React library itself :P
yarn add react react-domYou may ask what react-dom is doing here. Well, according to extensive research (i.e., a Google search):
“The react-dom package provides DOM-specific methods that can be used at the top level of your app and as an escape hatch to get outside of the React model if you need to” — ReactDOM documentation
That means react-dom acts as a middleman between DOM and React.
Create Index File
Now create a new file named index.tsx inside the src folder.
touch index.tsxUse the render method from the react-dom library to connect your index.html file’s content to your application.
import React from 'react';
import ReactDOM from 'react-dom';

ReactDOM.render(
  <div> This is a new react app</div>,
  document.getElementById('root')
);
This render method takes two things as input:
A
jsxcomponent (for now, the normaldiv)A real element from dom (our div with
id="root”that we added previously in ourindex.html)
Pretty simple. But we haven’t added TypeScript yet. Let’s do that!
Install TypeScript
Let’s now set up our TypeScript dependencies because modern React applications should be built with TypeScript.
yarn add -D typescript [@types/react](http://twitter.com/types/react) [@types/react-dom](http://twitter.com/types/react-dom)Configure TypeScript
Now let’s create a new file named tsconfig.jsonin the projects root directory (outside src).
touch tsconfig.jsonAdd the following content:
{
    "compilerOptions": {
      "target": "ES5" /* Specify ECMAScript target version: 'ES3' (default), 'ES5', 'ES2015', 'ES2016', 'ES2017', 'ES2018', 'ES2019', 'ES2020', or 'ESNEXT'. */,
      "module": "ESNext" /* Specify module code generation: 'none', 'commonjs', 'amd', 'system', 'umd', 'es2015', 'es2020', or 'ESNext'. */,
      "moduleResolution": "node" /* Specify module resolution strategy: 'node' (Node.js) or 'classic' (TypeScript pre-1.6). */ /* Type declaration files to be included in compilation. */,
      "lib": [
        "DOM",
        "ESNext"
      ] /* Specify library files to be included in the compilation. */,
      "jsx": "react-jsx" /* Specify JSX code generation: 'preserve', 'react-native', 'react' or 'react-jsx'. */,
      "noEmit": true /* Do not emit outputs. */,
      "isolatedModules": true /* Transpile each file as a separate module (similar to 'ts.transpileModule'). */,
      "esModuleInterop": true /* Enables emit interoperability between CommonJS and ES Modules via creation of namespace objects for all imports. Implies 'allowSyntheticDefaultImports'. */,
      "strict": true /* Enable all strict type-checking options. */,
      "skipLibCheck": true /* Skip type checking of declaration files. */,
      "forceConsistentCasingInFileNames": true /* Disallow inconsistently-cased references to the same file. */,
      "resolveJsonModule": true,
      "allowJs": true /* Allow javascript files to be compiled. Useful when migrating JS to TS */,
      "checkJs": true /* Report errors in .js files. Works in tandem with allowJs. */,
    },
    "include": ["src/**/*"],
    "exclude": ["node_modules", "build"] // *** The files to not type check ***
  }
Comments in this file explain what each of the options does. You may want to tweak little things here and there to satisfy your needs.
Install Babel
Now we need to install Babel into our project. That’s because our browsers don’t understand anything but JavaScript, so if we want our browsers to understand our jsx or tsx- files, we need some compiler.
Babel will do that for us. Let’s install some dependencies:
yarn add --dev \
  @babel/core \
  @babel/cli \
  @babel/preset-env \
  @babel/preset-typescript \
  @babel/preset-react
Explanation
The first three libraries are needed by default. We need preset-typescript for compiling TypeScript and preset-react for compiling our React-specific files.
If we want additional support for async/awaits, we will need to add two additional libraries.
yarn add -D \
 @babel/runtime \
 @babel/plugin-transform-runtime
These will help to compile async/await syntax, which is a must at this point.
Configure Babel
We will create a new file named .babelrc in the project's root folder.
touch .babelrcAdd the following configuration there.
{
    "presets": [
        "@babel/preset-env",
        [
            "@babel/preset-react",
            {
                "runtime": "automatic"
            }
        ],
        "@babel/preset-typescript"
    ],
    "plugins": [
        [
            "@babel/plugin-transform-runtime",
            {
                "regenerator": true
            }
        ]
    ]
}
Install webpack
To get webpack working, we will need to install some dependencies.
yarn add --dev \
    webpack \
    webpack-cli \
    webpack-dev-server \
    style-loader \
    css-loader \
    babel-loader \
    html-webpack-plugin \
    clean-webpack-plugin
Configure webpack
Then create a new file named webpack.config.js in the root folder.
touch webpack.config.jsAdd the following content there.
const path = require('path');
const HtmlWebpackPlugin = require('html-webpack-plugin');
const { CleanWebpackPlugin } = require('clean-webpack-plugin');

module.exports = {
    entry: path.resolve(__dirname, 'src', 'index.tsx'),
    output: {
        path: path.resolve(__dirname, 'dist'),
        filename: 'bundle.js',
    },
    mode: 'development',
    module: {
        rules: [
            {
                test: /\.[jt]sx?$/,
                use: ['babel-loader'],
                exclude: /node_modules/,
            },
            {
                test: /\.css$/,
                use: ['style-loader', 'css-loader'],
            },
            {
                test: /\.scss$/,
                use: ['style-loader', 'css-loader', 'sass-loader'],
            },
            {
                test: /\.(?:ico|gif|png|jpg|jpeg)$/i,
                type: 'asset/resource',
            },
            {
                test: /\.(woff(2)?|eot|ttf|otf|svg|)$/,
                type: 'asset/inline',
            },
        ],
    },
    resolve: {
        extensions: ['.tsx', '.ts', '.js', '.jsx'],
    },
    plugins: [
        new HtmlWebpackPlugin({
            template: path.resolve(__dirname, './src/index.html'),
        }),
        new CleanWebpackPlugin(),
    ],
    devServer: {
        static: path.join(__dirname, './src'),
        port: 3001,
        hot: 'only',
        compress: true,
        open: true,
    },
};
Quite confusing? Not really. If you are familiar with webpack, then this configuration should make sense.
If you want to learn more about the explanation of this setup, you can refer to the following article. We won't go into details here for now.
Add Script
Now go into the package.json file and add the following script for starting the application.
"scripts": {
  "start": "webpack serve --config webpack.config.js --env env=development",
  "build": "webpack --config webpack.config.js --env env=production"
},
Open a terminal and run the following command:
yarn startYou should be greeted with the application running on your browser.

Similarly, if you want to build for production, you can run
yarn buildCongratulations! You have successfully set up a React application on your own. But if you are interested in good standards, here are bonus sections.
Install Prettier
Install the following dependencies for Prettier.
yarn add -D
  prettier \
  eslint-config-prettier \
  eslint-plugin-prettier
Configure Prettier
Create a file named .prettierrc.js inside the root folder.
touch .prettierrc.jsAdd the following content:
module.exports = {
    semi: true,
    trailingComma: 'all',
    jsxSingleQuote: false,
    singleQuote: true,
    printWidth: 120,
    tabWidth: 4,
};
Install ESLint
To install ESLint, first, install the following dependencies:
yarn add -D \
  eslint \
  eslint-plugin-react \
  eslint-plugin-react-hooks \
  @typescript-eslint/parser \
  @typescript-eslint/eslint-plugin \
  eslint-plugin-jsx-a11y \
  eslint-plugin-import \
Configure ESLint
Then add a file named .eslintrc.js inside the root folder.
touch .eslintrc.jsAdd the following contents.
module.exports = {
    parser: '@typescript-eslint/parser',
    parserOptions: {
        ecmaVersion: 2020,
        sourceType: 'module',
        ecmaFeatures: {
            jsx: true, // Allows for the parsing of JSX
        },
    },
    settings: {
        react: {
            version: 'detect',
        },
    },
    extends: [
        'plugin:react/recommended',
        'plugin:react-hooks/recommended',
        'plugin:@typescript-eslint/recommended',
        'plugin:import/errors',
        'plugin:import/warnings',
        'plugin:import/typescript',
        'plugin:jsx-a11y/recommended',
        'plugin:prettier/recommended', //should be at the last
    ],
    rules: {
        'no-unused-vars': 'off',
        '@typescript-eslint/no-unused-vars': ['error'],
        '@typescript-eslint/no-var-requires': 'off',
        'react-hooks/rules-of-hooks': 'error',
        'react-hooks/exhaustive-deps': 'warn',
        'react/prop-types': 'off',
        'react/jsx-uses-react': 'off',
        'react/react-in-jsx-scope': 'off',
        '@typescript-eslint/explicit-module-boundary-types': 'off',
    },
};
Script for Linter and Prettier
Now add two more scripts to run Prettier and ESlint.
 "scripts": {
    "start": "webpack serve --config webpack/webpack.config.js --env env=dev",
    "build": "webpack --config webpack/webpack.config.js --env env=prod",
    "lint": "eslint --fix \"./src/**/*.{js,jsx,ts,tsx,json}\"",
    "format": "prettier --write \"./src/**/*.{js,jsx,ts,tsx,json,css,scss,md}\""
},
That’s it. Now you have a fully functioning React application with TypeScript. Here is the repository.
Imagine how many things are being made easy for us by create-react-app. I hope you learned a thing or two from this article.
Have a great day! :D
Resources
Building a Modern React App From Scratch in 2021 by Yakko Majuri
Get in touch with me via LinkedIn .