Continuous Deployment Pipeline for React Apps
For hosting React applications there are many good options. AWS s3 is one of them and it's very cheap and reliable.
Deployment can be a really boring part of your day-to-day job. We should automate as much as possible.
Today we will see how we can create a continuous deployment pipeline using Github actions that will automatically build and deploy our website to aws s3.
Pre Requisites
To follow along with me I assume you already have
A GitHub account
An AWS account
A Running ReactJS project
Let’s get started . . .
Step 1. Create S3 Bucket
Login to AWS console
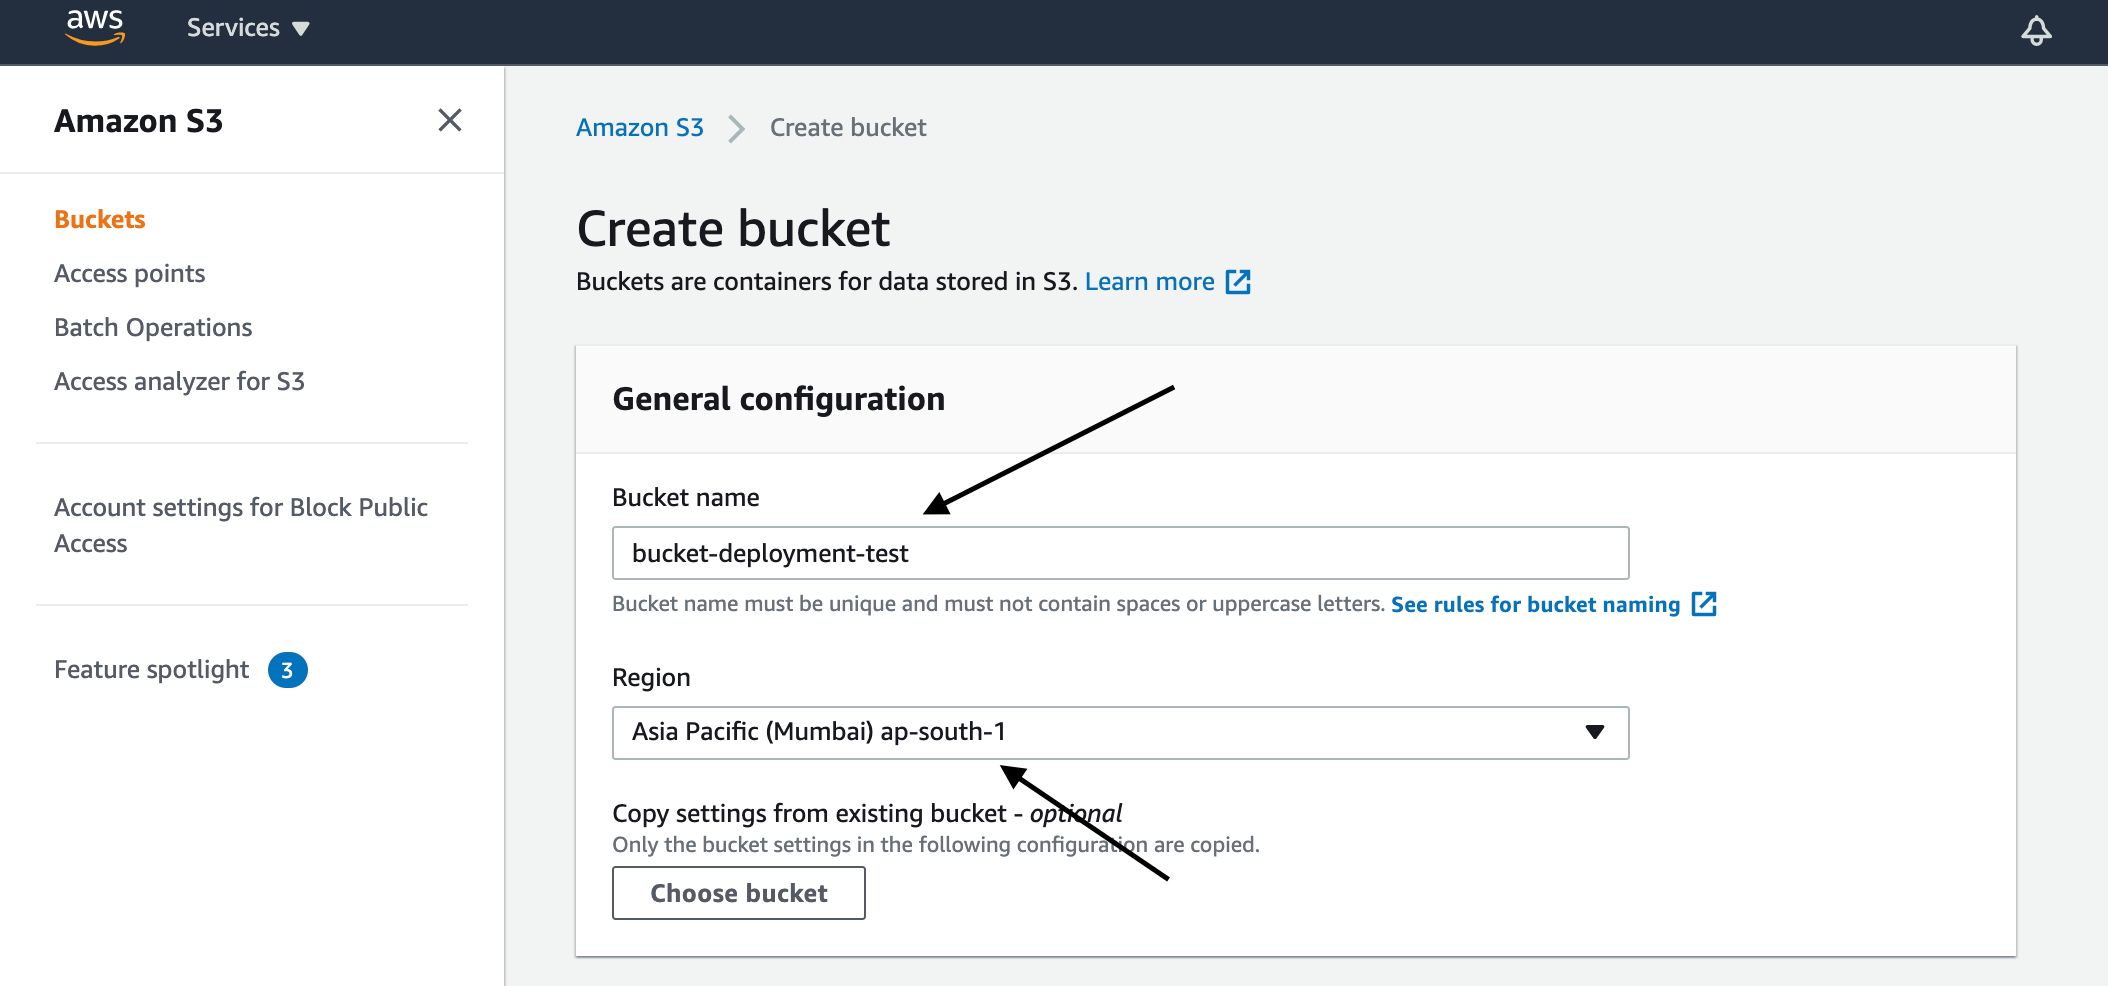
Search S3 from your services and click Create Bucket
Give an appropriate name and select the region. Remember the value for your region (for me it is ap-south-1)
- Scroll down and uncheck the block public access. This is not recommended if you are using S3 for other purposes. But if you want to host your static website it’s necessary.
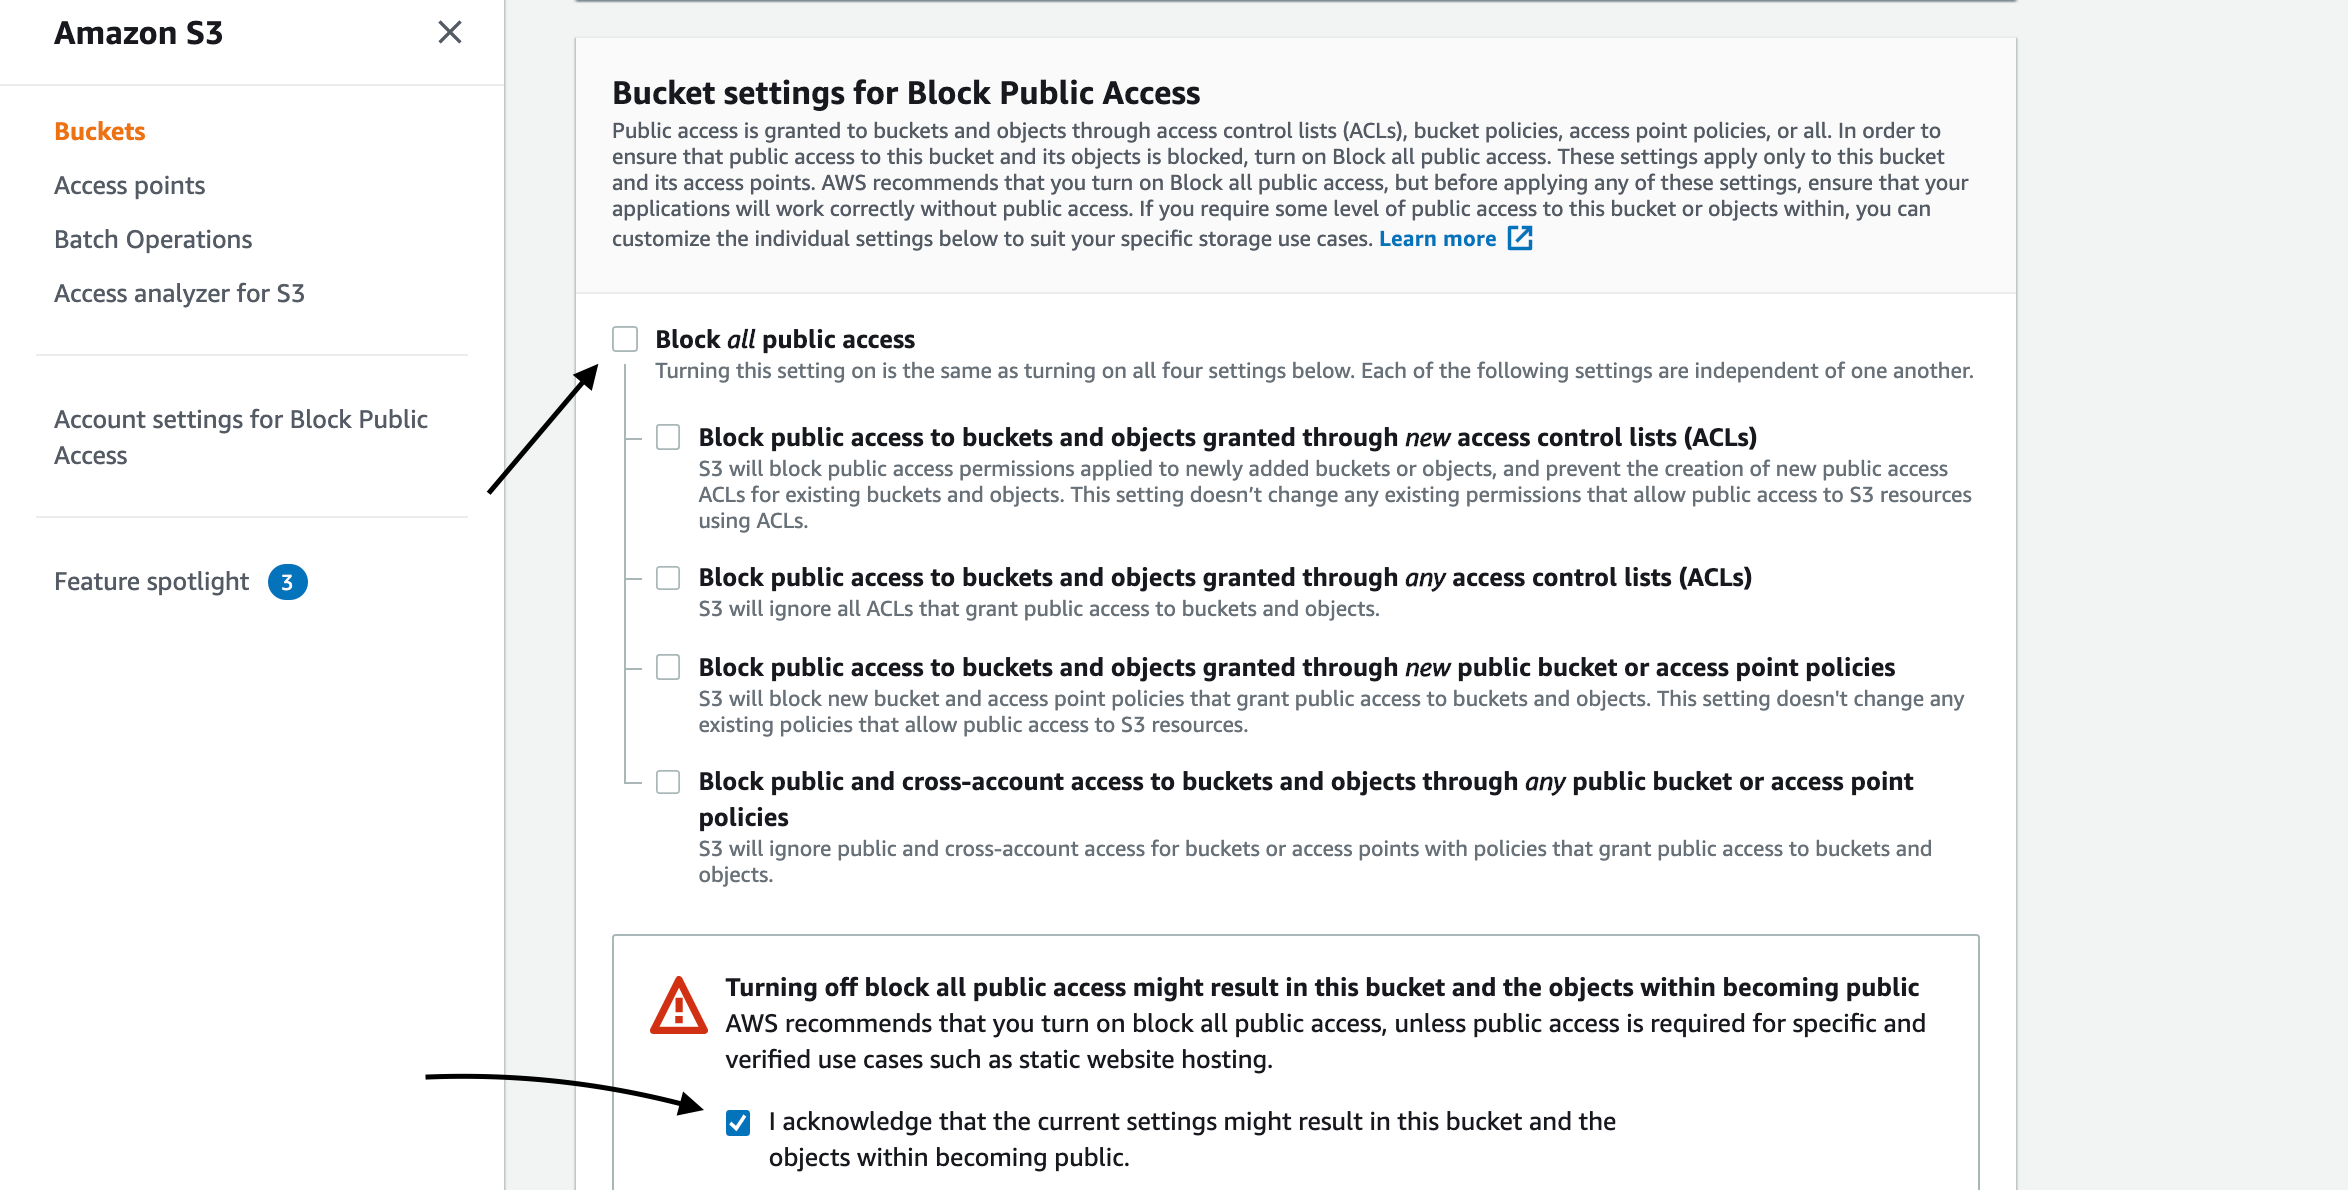
- Leave other options as it is and click Create Bucket.
Step 2. Edit Properties to Enable Static Hosting
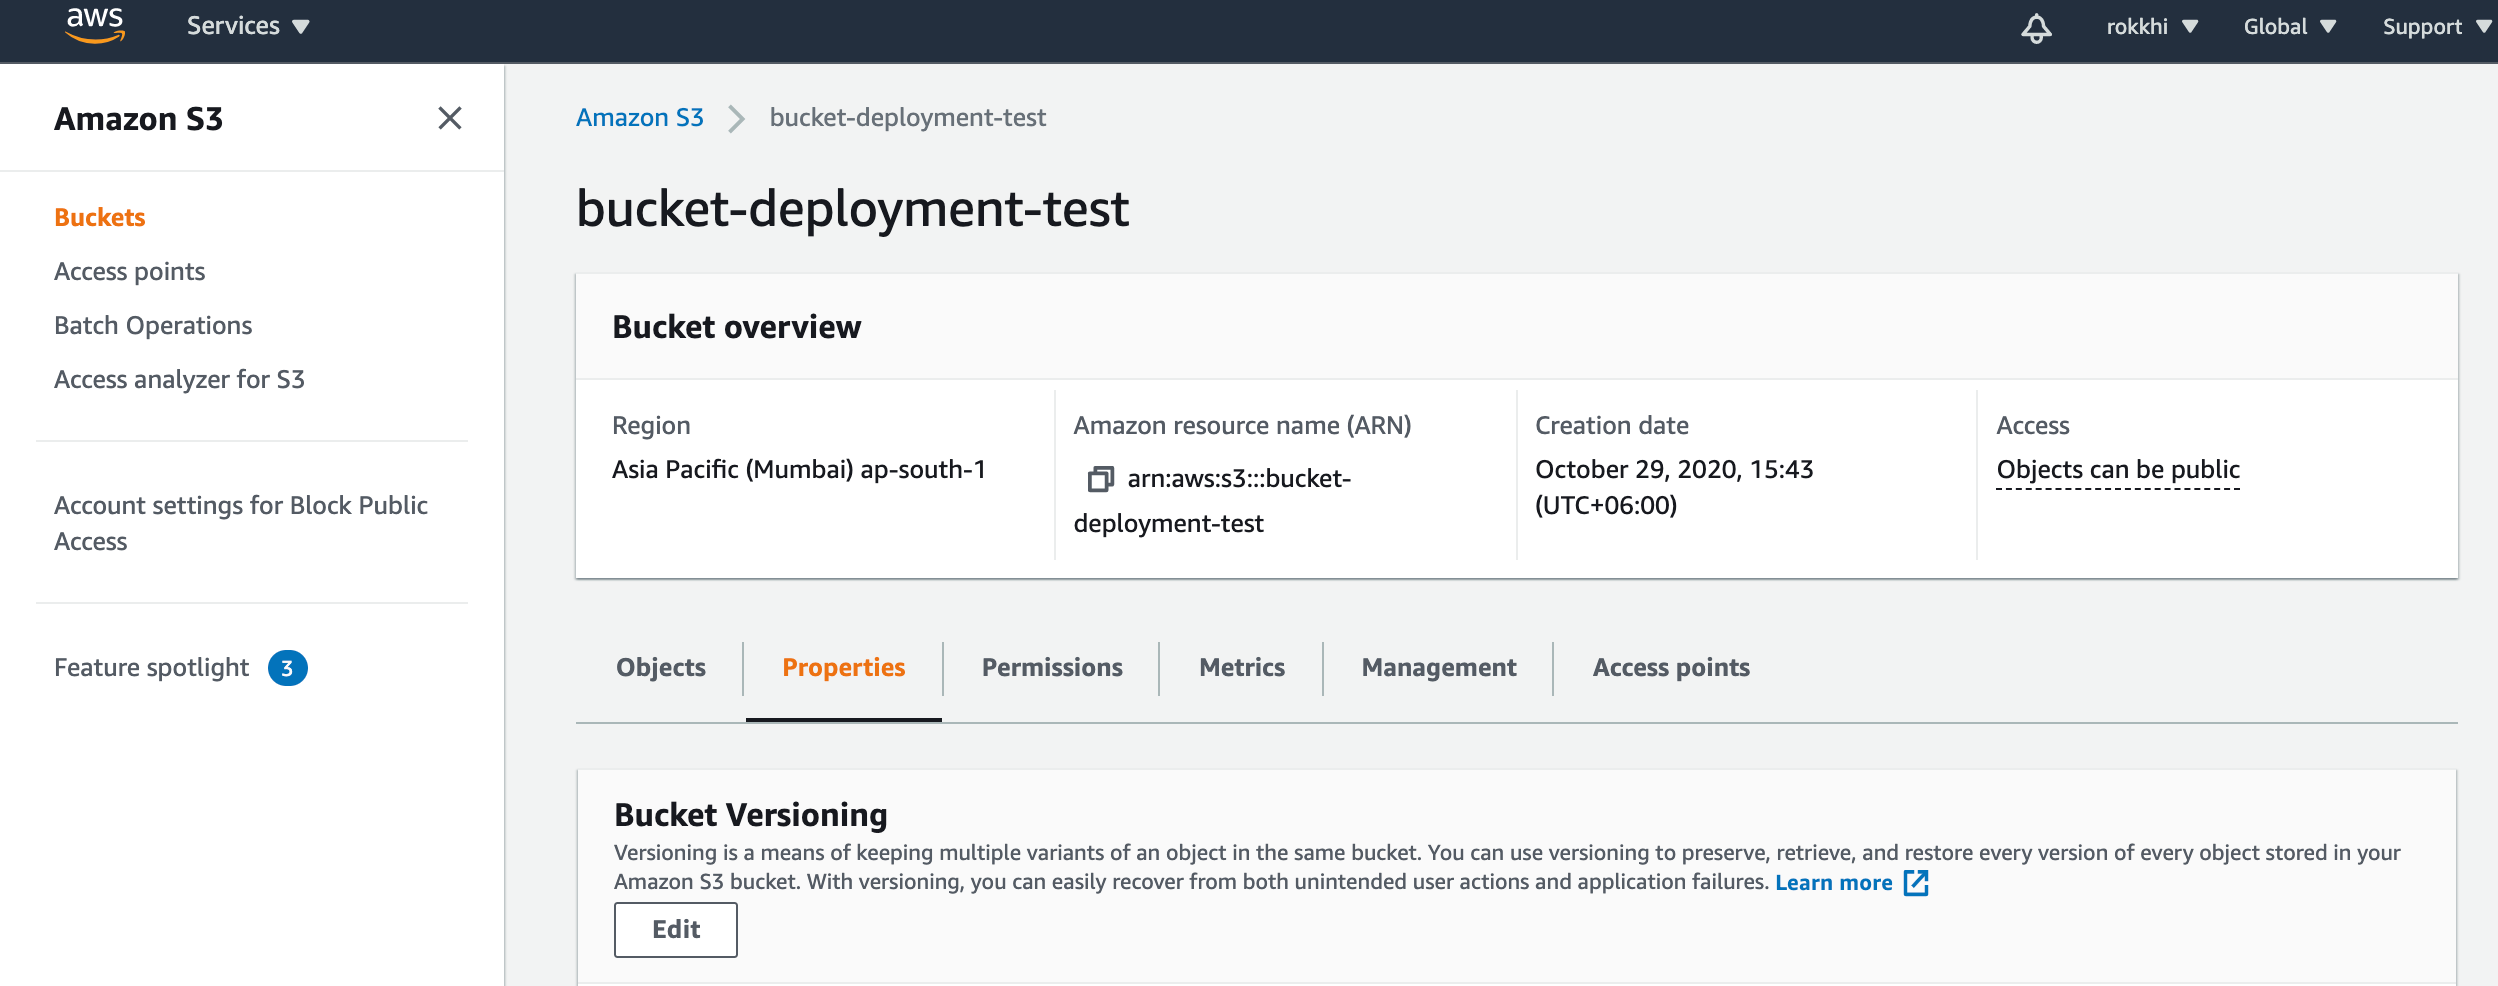
- After your bucket is created you can see it on the list. Click on the bucket name and open the Bucket overview. Select Properties tab
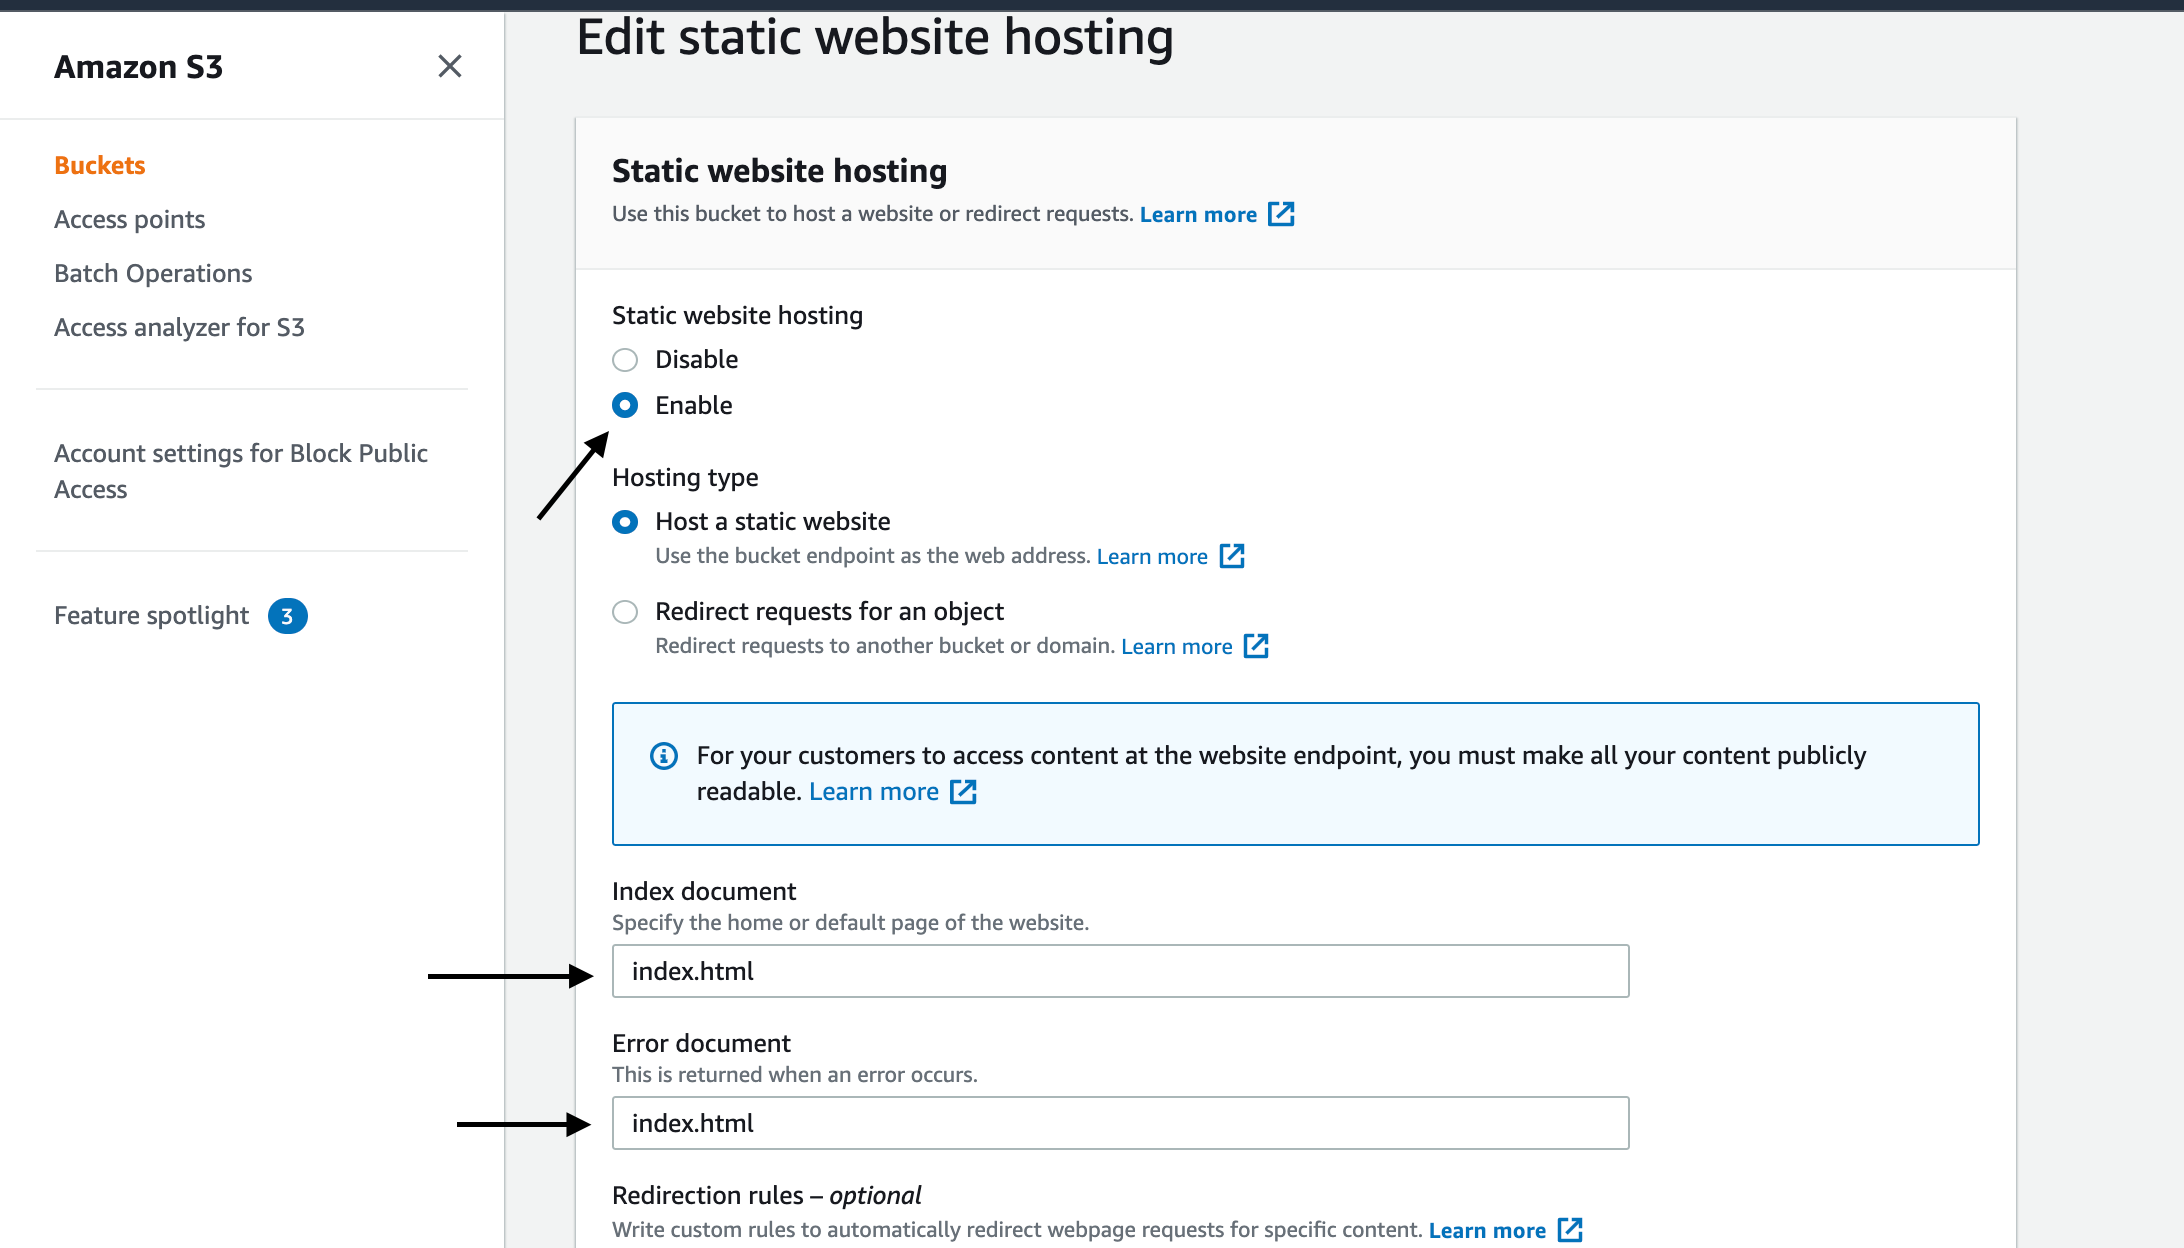
Scroll down to find the option of Static website hosting. Click Edit
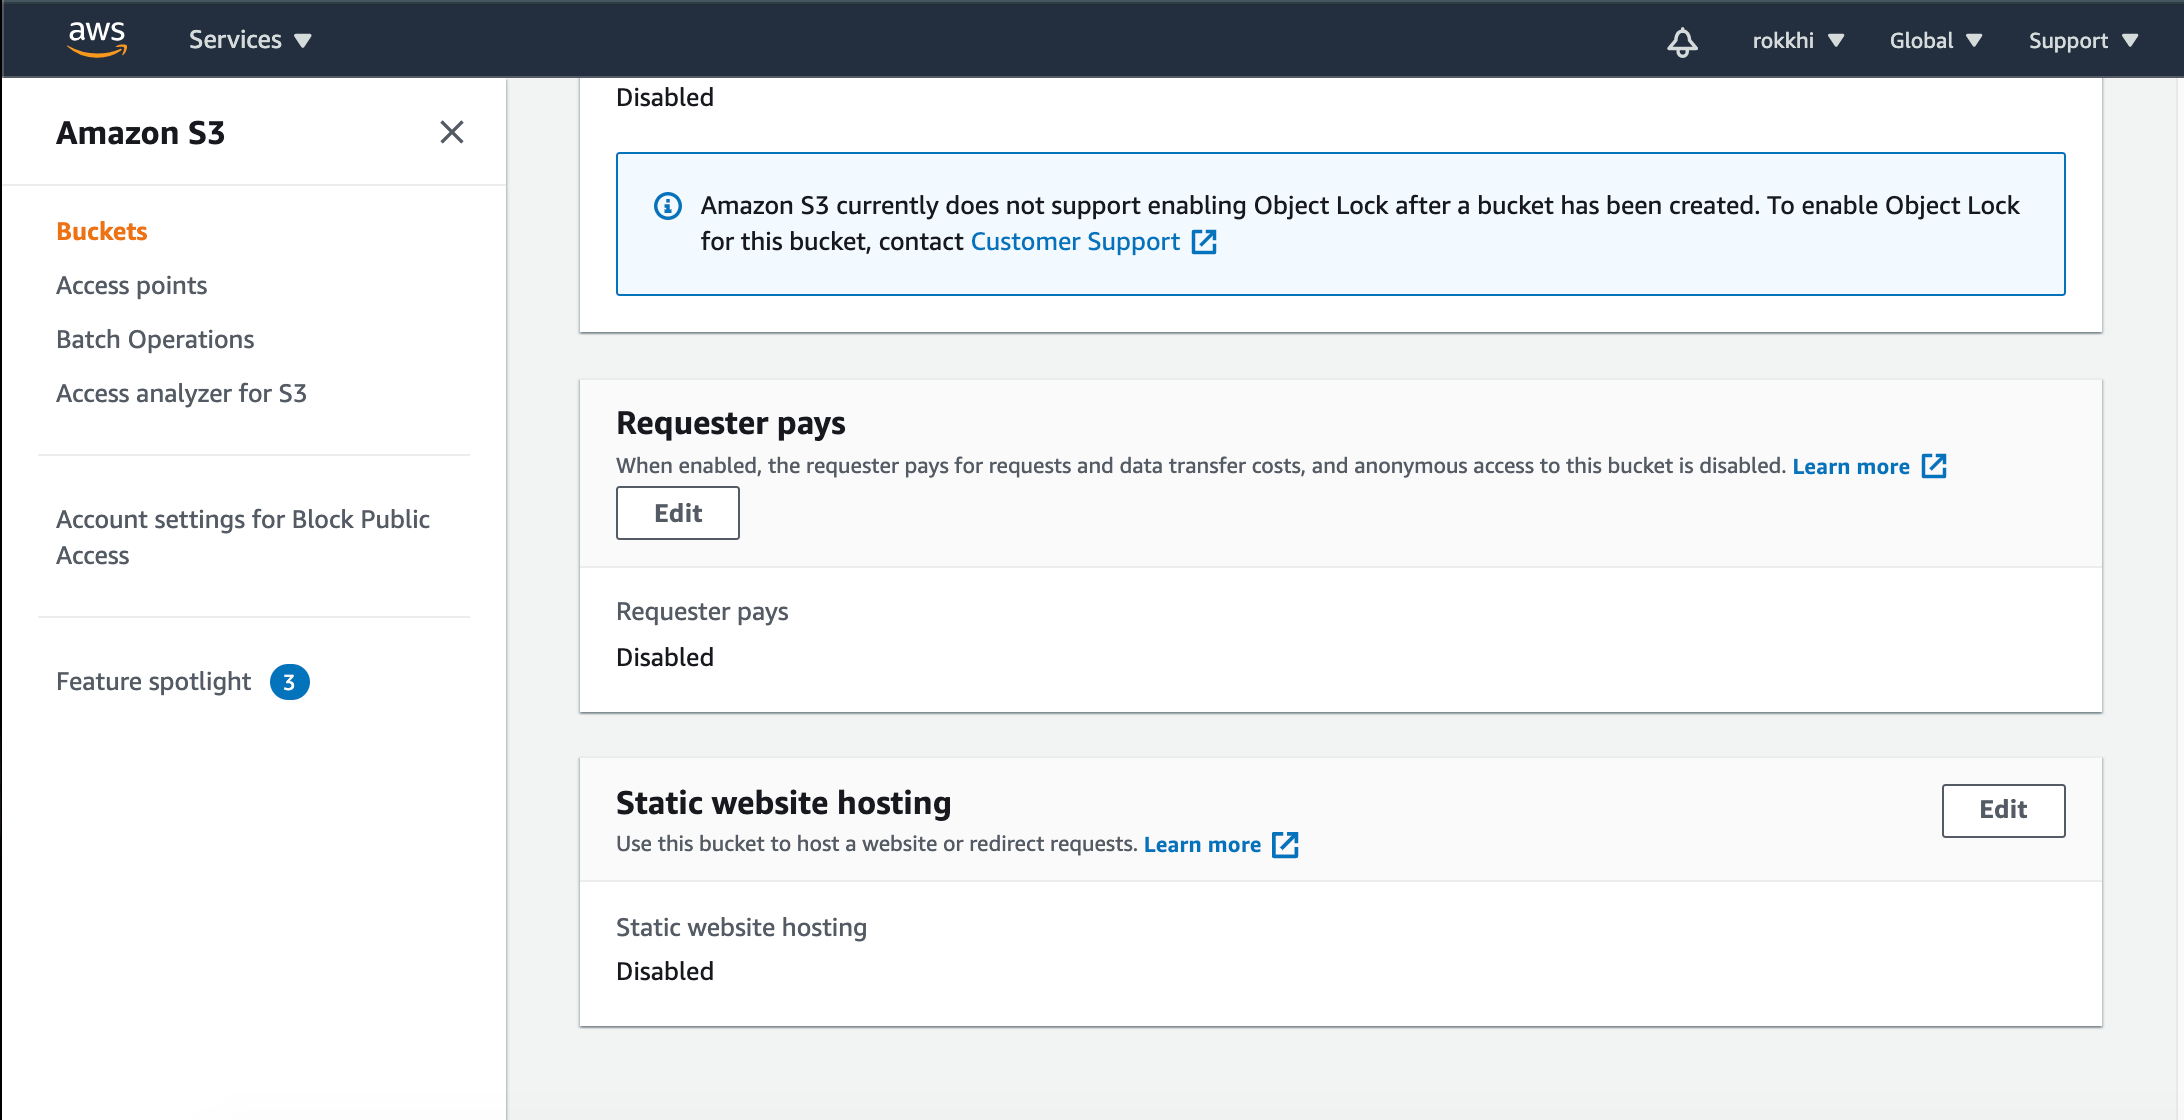
Enable the hosting option. and select Host a static website
Give index.html as your index document. An important thing to note For error document you should also give index.html because when we build react application inside the build folder there is only one index.html file.
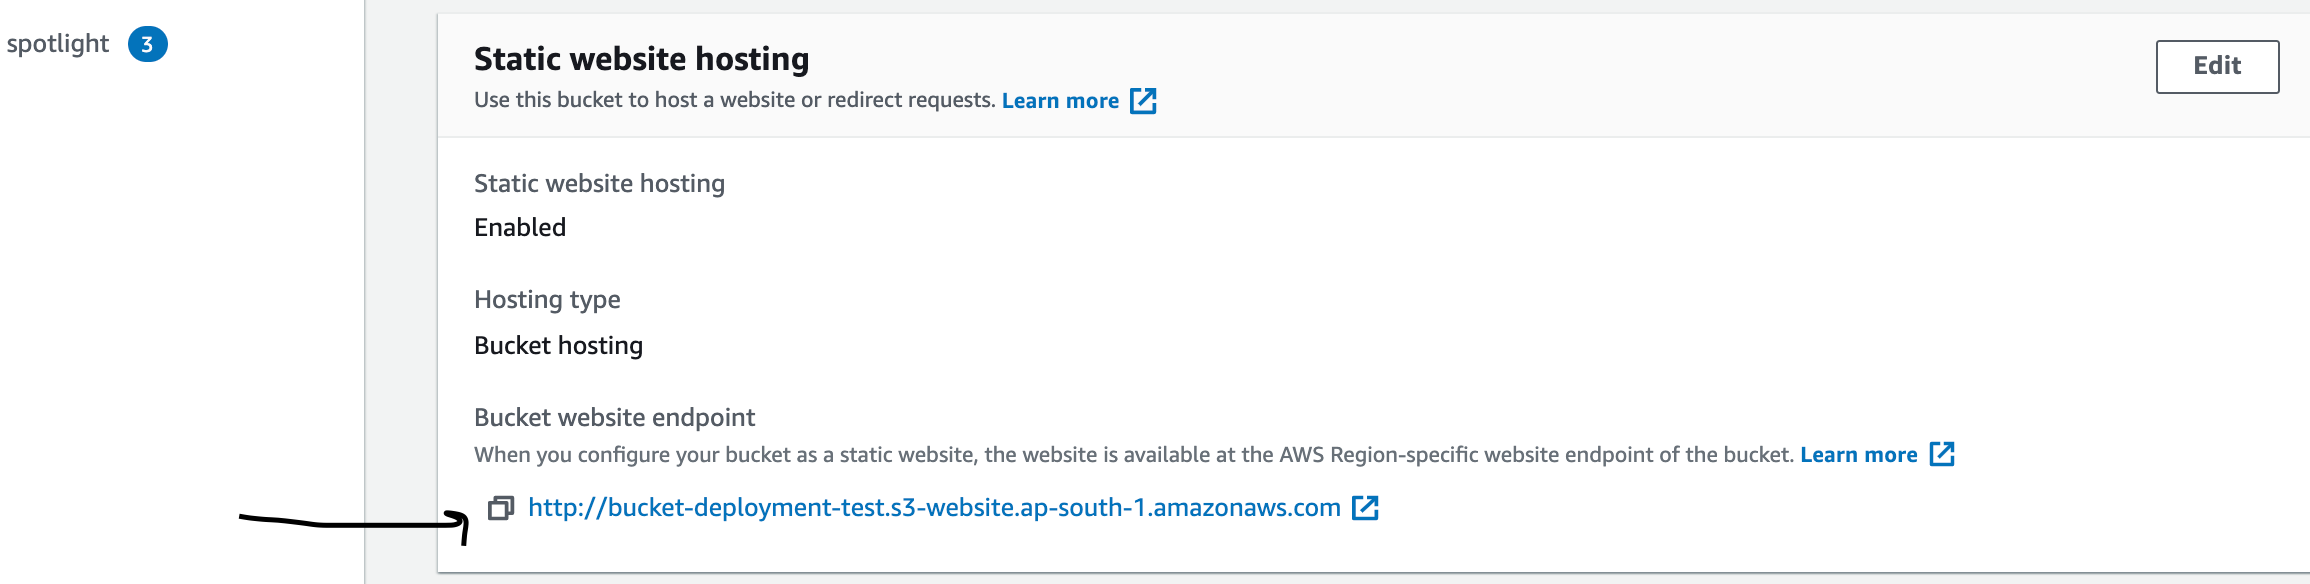
- Save Changes. And copy the URL that is given to you. It will be used to access your website.
Step 3. Allow Permission to Access Website
Now open the Permissions beside the properties tab. Click on Edit Bucket Policy and add the following code
{
    "Version": "2012-10-17",
    "Statement": [
        {
            "Sid": "PublicReadGetObject",
            "Effect": "Allow",
            "Principal": "*",
            "Action": [
                "s3:GetObject"
            ],
            "Resource": [
                "arn:aws:s3:::<bucket-name>/*"
            ]
        }
    ]
}
An important thing to note: Replace
<bucket-name>with your bucket name.
- Hit save and you are good to go.
Now you can upload your static website (For React the contents inside the build folder after we run the command npm run build.) If you go to your URL of static hosting you can view your website.
But we need to automate things. We don’t want to do the transfer of the contents of the build folder every time we need to publish our website.
For this purpose, we will use GitHub actions.
Step 4. Add AWS Secrets to Github
Now we need to grab some secrets from our aws console to allow GitHub to authenticate on our behalf. From AWS console go to IAM > Users > Security Credentials > Create Access Key .
You will be given two values AWS_ACCESS_KEY AWS_SECRET_ACCESS_KEY. Add these two values along with the region name of your bucket.

- Add these values to your repositories settings -> Secrets option.
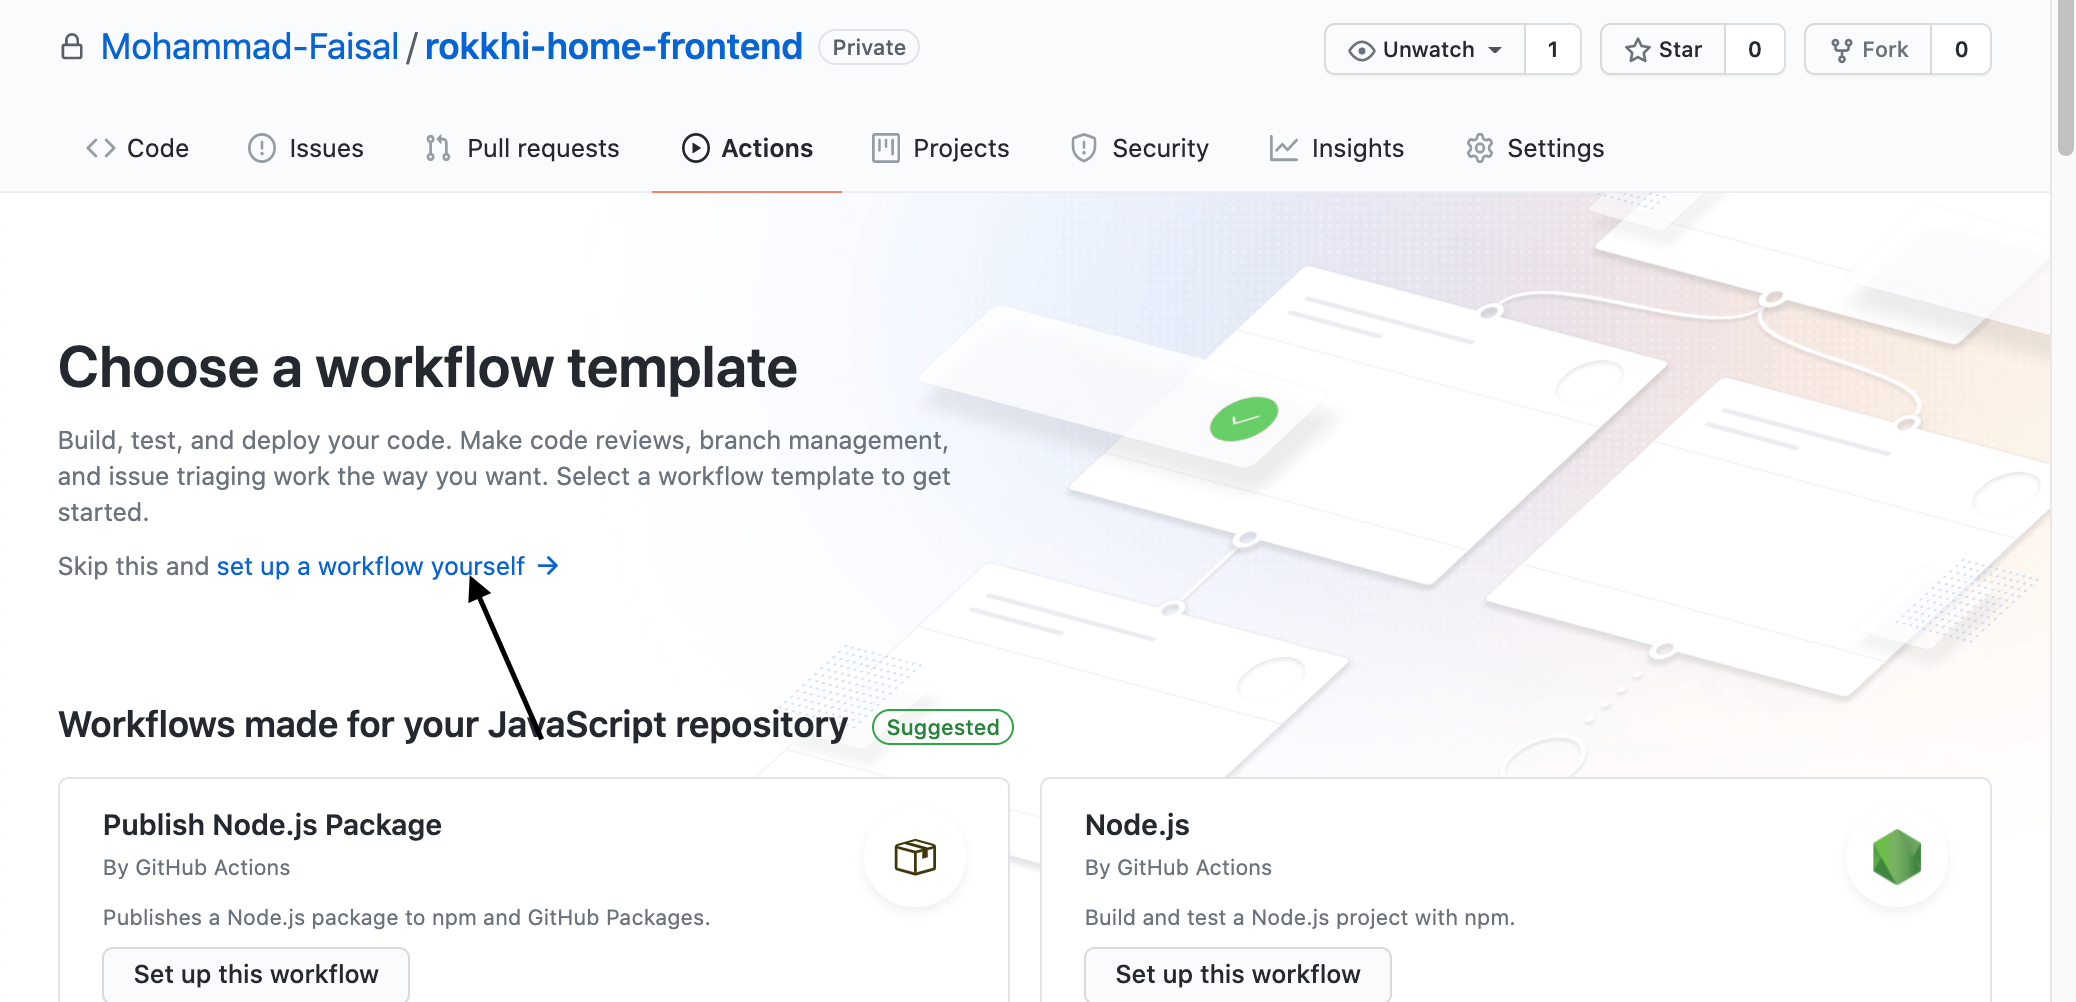
Step 5. Setup Action
Set up a new action in your repository. We will create a workflow from scratch.
It will create a new file inside
.github/workflows/main.yml. You can change the name main. to the auction description (Like aws_deployment.yml )
- Add the following code. Replace the <bucket-name> at the bottom of your file with your own bucket name that you created earlier.
name: s3-deployment
on:
  release:
    types: [created]
jobs:
  build:
    runs-on: ubuntu-latest
    steps:
      - uses: actions/checkout@v2
      - name: Configure AWS Credentials
        uses: aws-actions/configure-aws-credentials@v1
        with:
          aws-access-key-id: ${{ secrets.AWS_ACCESS_KEY_ID }}
          aws-secret-access-key: ${{ secrets.AWS_SECRET_ACCESS_KEY }}
          aws-region: ${{ secrets.AWS_REGION }}
      - name: Build React App
        run: npm install && CI=false  npm run build
      - name: Deploy app build to S3 bucket
        run: aws s3 sync ./build/ s3://<bucket-name> --delete
This action will
Run-on every release (You can modify it to run on every push to the master branch )
It will log in to aws using your secret access keys
It will build your project
Then transfer the contents inside the build folder to your s3 bucket.
Now you can commit the file and run the job. Or Create a release for your project and see the progress from the actions tab.
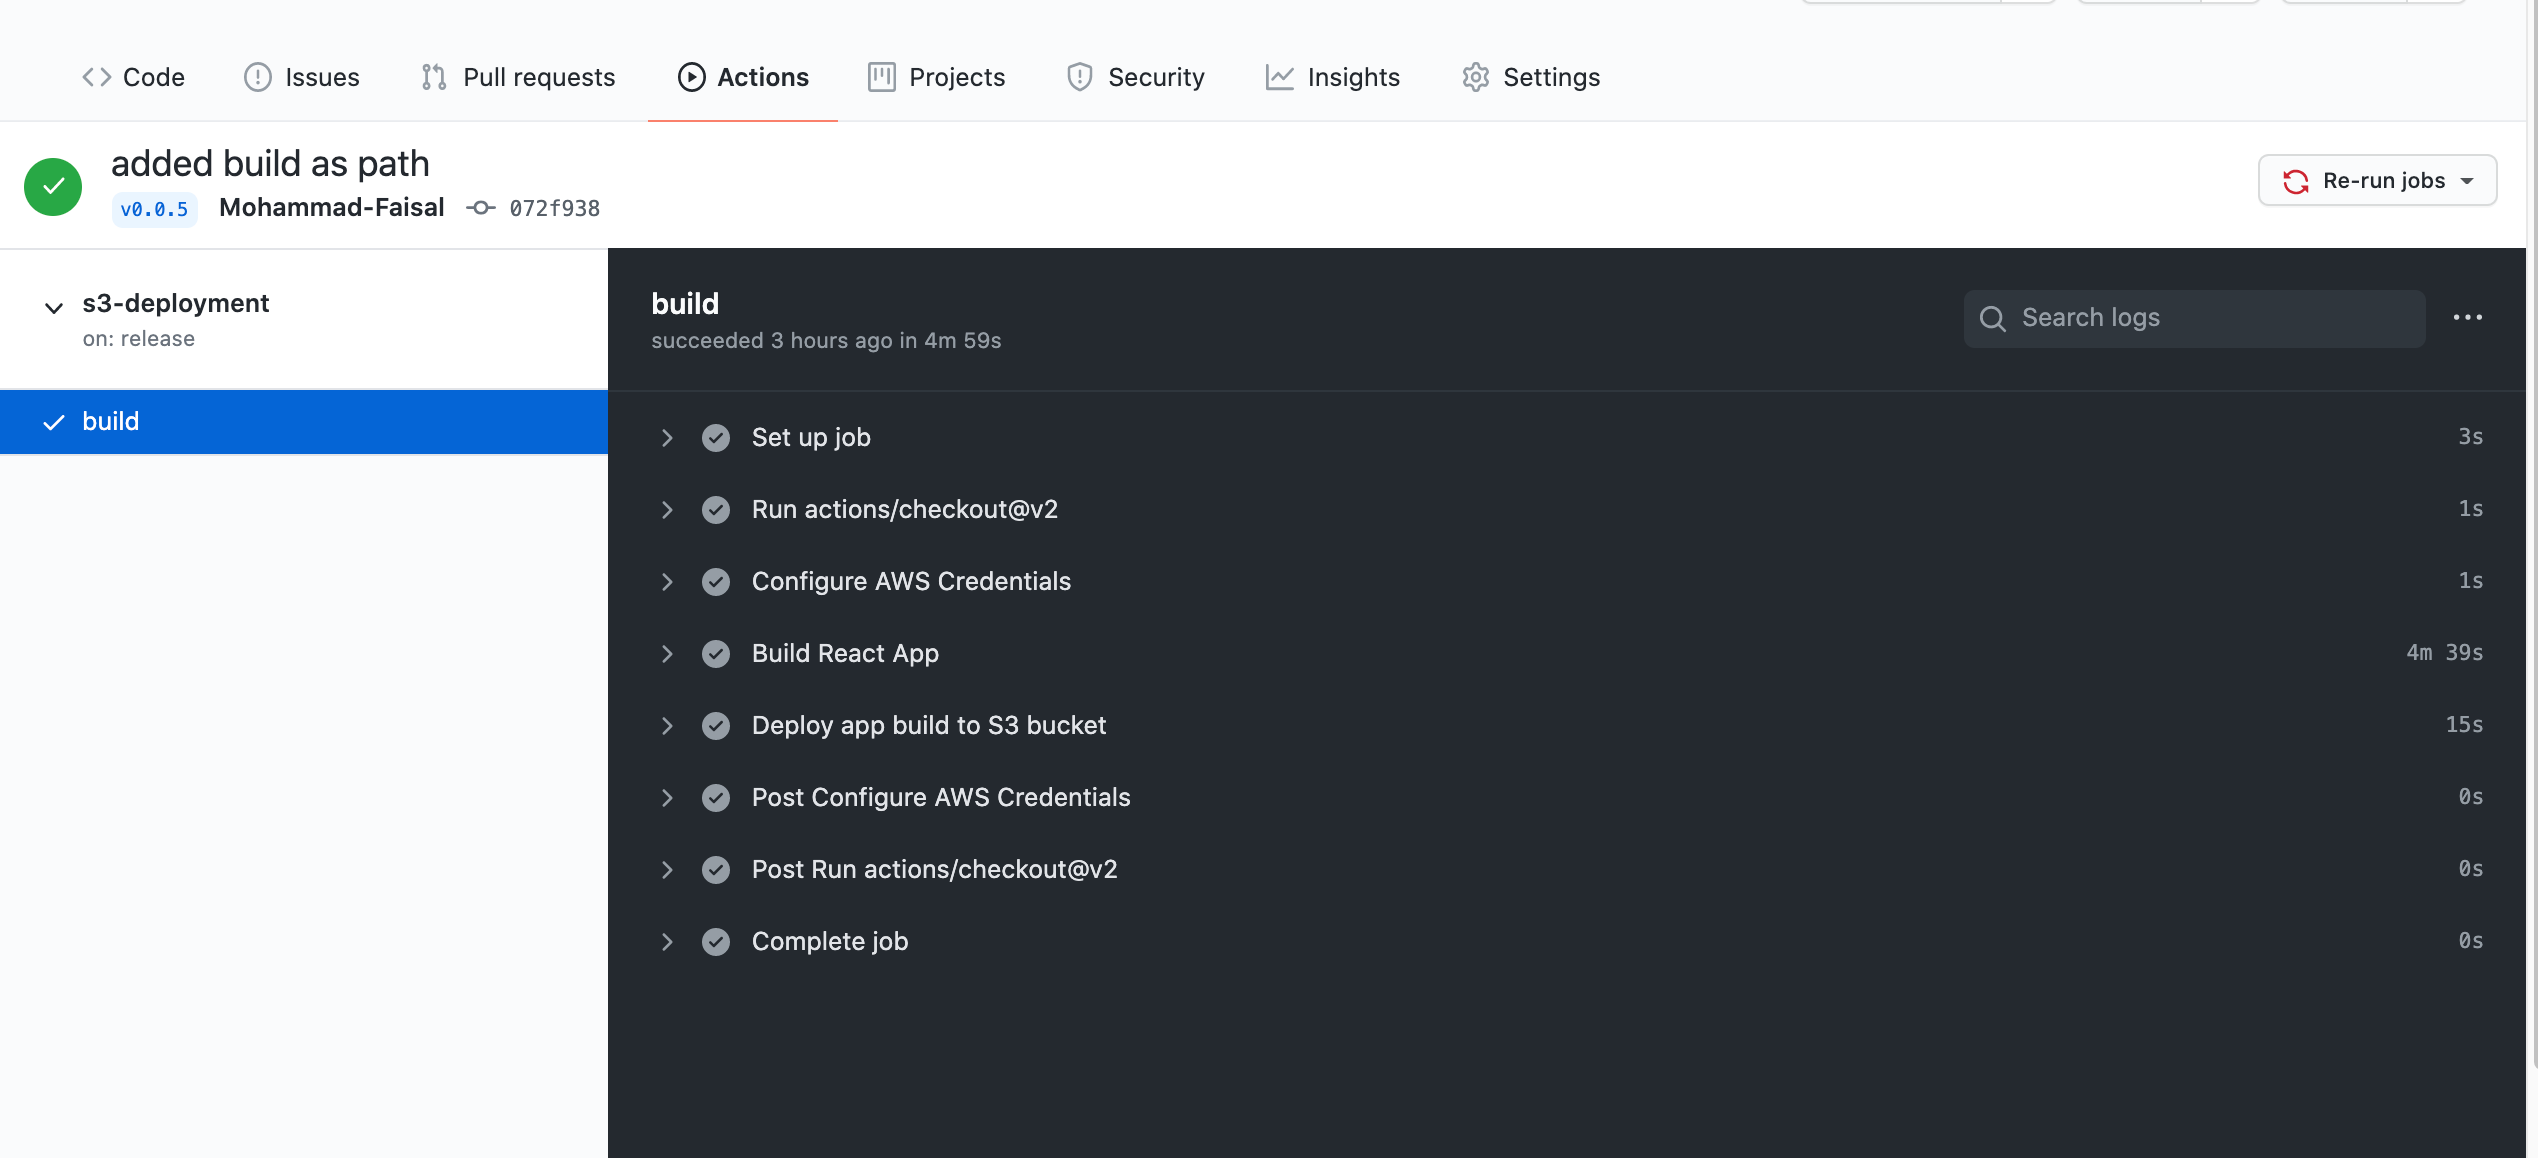
If everything goes well you can go to your aws bucket to see that it now contains the contents of your build folder.
Congratulations! Now you have a continuous deployment pipeline that will be triggered every time you create a release for your project. You don’t need to do the dirty work of deployment yourself anymore.
That’s if for today. Happy Coding!
Get in touch with me via LinkedIn or my Personal Website.