Create Simple API With AWS CDK
How to use aws cdk to create API for your application
In this age of cloud development and serverless architecture, the ability to write infrastructure as code is really powerful.
There are many options to choose from. Let’s explore them!
Options to consider
AWS has several tools to support infrastructure as code. Among them, Cloudformation is the most powerful one but it’s very verbose.
Another option is AWS SAM which is an extension of Cloudformation with reduced syntax. But unlike Cloudformation we have to use JSON or YAML syntax for this.
Then comes the AWS CDK
What is AWS CDK?
According to AWS documentation.
The AWS Cloud Development Kit (AWS CDK) is an open source software development framework to define your cloud application resources using familiar programming languages
In simple terms, we can use our typescript or python code to define resources in the cloud.
This is powerful for us developers because we don’t have to use some fancy YAML syntax to write infrastructure code anymore!
What we will build today?
To understand the power of AWS CDK we will build a simple hello world application. it will have a Lambda function and an ApiGateway resource.
We will invoke the API to get a response from the lambda.
Let’s begin.
Initialize the project
Go to your terminal and run the following commands
mkdir learn-aws-cdk
cd learn-aws-cdk
cdk init app --language typescript
Then install required dependencies
We will need lambda and apigateway to build our application. To install the required dependencies
npm i @aws-cdk/aws-lambda @aws-cdk/aws-apigatewayWell, we will install a special package as well. This package is specially built for nodejs lambdas.
The benefit of using this library is
- This library automatically handles our typescript files (No need for webpack)
- This library enables us to compress the function output.
Let’s add that
npm i @aws-cdk/aws-lambda-nodejsNow we are ready to write some functions
Create the lambda
Now create a new folder src/hello-lambda . Just to keep things organized
Then create a new file under that folder app.ts
Add the following code
exports.handler = async function (event: any, context: any) {
  console.log("request ", JSON.stringify(event));

  const responseText = "Hello from lambda";

  return {
    headers: {
      "Access-Control-Allow-Origin": "*",
      "Access-Control-Allow-Credentials": true,
      "Access-Control-Allow-Methods": "*",
      "Access-Control-Allow-Headers":
        "Access-Control-Allow-Headers, Origin,Accept, X-Requested-With, Content-Type, Access-Control-Request-Method, Access-Control-Request-Headers, Authorization",
    },

    isBase64Encoded: false,
    multiValueHeaders: {},
    statusCode: 200,
    body: JSON.stringify(responseText),
  };
};
Now we have the lambda but where do we use it?
Add the lambda to our stack
Now head over to the lib/learn-aws-cdk-stack.ts
Add the following codes to include your lambda and apigateway to the stack
import * as cdk from "@aws-cdk/core";
import * as lambda from "@aws-cdk/aws-lambda";
import * as apigateway from "@aws-cdk/aws-apigateway";
import { NodejsFunction, NodejsFunctionProps } from "@aws-cdk/aws-lambda-nodejs";

import * as path from "path";

export class WinterWonderlandBackendStack extends cdk.Stack {
  constructor(scope: cdk.Construct, id: string, props?: cdk.StackProps) {
    super(scope, id, props);

    // The code that defines your stack goes here

    const myLambda = new NodejsFunction(this, "AttractionsLambdaHandler", {
      runtime: lambda.Runtime.NODEJS_14_X,
      entry: path.join(__dirname, `../src/hello-lambda/app.ts`),
      handler: "handler",
      timeout: cdk.Duration.seconds(20),
      bundling: {
        minify: true,
        externalModules: ["aws-sdk"],
      },
    });

    const api = new apigateway.RestApi(this, "first-api", {
      defaultCorsPreflightOptions: {
        allowOrigins: apigateway.Cors.ALL_ORIGINS,
      },
    });
    const getAllIntegration = new apigateway.LambdaIntegration(myLambda);
    const items = api.root.addResource("hello");
    items.addMethod("GET", getAllIntegration);
  }
}
Notice at the end of the file we have added the cors configuration to be
allowOrigins: apigateway.Cors._ALL_ORIGINS,This is a nice feature that allows us to allow any URL to hit our API. (Otherwise, you will get a CORS error from the browser if you are trying to hit from a front-end application)
Deploy the stack
Now comes the fun part. First, we need to compile our lambda code which will be handled by the aws-lambda-nodejs library.
Then, we need to generate the cloud formation template for our project. To do all this we just need to run the following command
cdk synthThis will give you a .yaml file as an output on the terminal.
Now if you want to deploy it run the next command. to prepare the environment. First, open the bin/learn-aws-cdk.ts file and uncomment the file that says
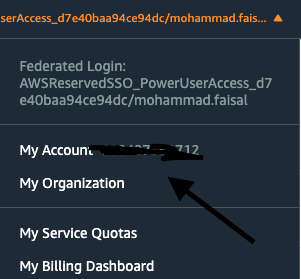
env: { account: "YOUR_ACCOUNT_ID", region: "us-east-1" },Where do you get your account id? Log in to your aws console and click on the top menu over your name.
Now we need to prepare the application as well. To do that run the following command
cdk bootstrap cdk bootstrap aws://YOUR_ACCOUNT_ID/us-east-1If that is successful now you can run the deploy command to deploy the application to the cloud.
cdk deployAnd you will be greeted with an URL that you can use to call the lambda API.
That’s it for today. Hope you learned something new!
Have a great day! :D