How to Access Private S3 Buckets Securely
Uploading a file to a remote server is one of the most common tasks of any modern application. AWS has a service named S3(Simple Storage Service), which makes this job really easy.
But do you know how we can securely access the buckets?
Well, today we will see how we can perform the most common 2 operations securely
Upload file to S3
Download file from S3
Let's start with uploading files.
First things first
I assume you already know how to create an S3 bucket. If not there are tons of articles.
You can start with any bucket you already have and do the following
Go to the bucket -> permissions -> Block all public access

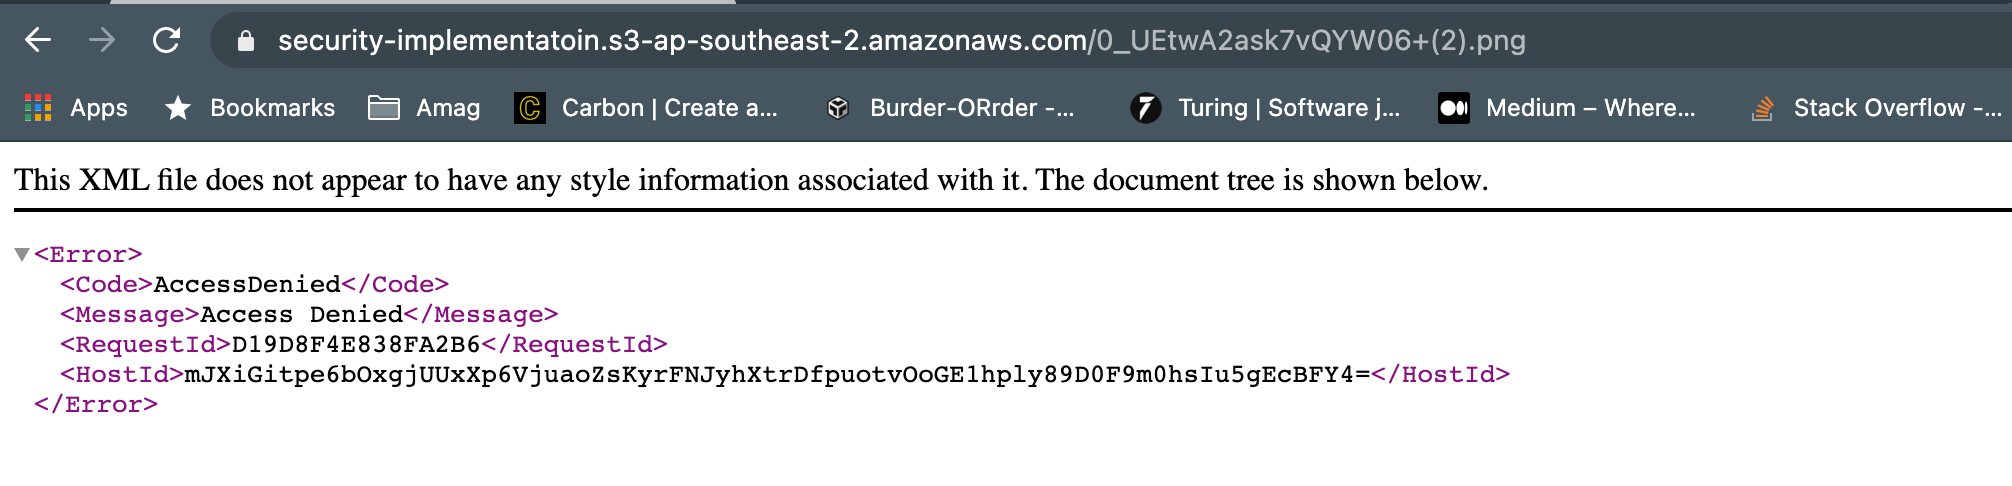
Now our bucket is secured. Now when anyone tries to access the bucket they will see this instead of the actual file.
Okay so now we have our bucket is secured. But we need to access it right?
Let’s start with how we can upload files to our bucket.
Option 1. Upload Via Custom Backend
You can send the file to some kind of server and then do the validation and with proper authentication tokens send the file to s3 and return the URL to the user.
The flow looks like this,
Frontend Application -> Custom Backend -> S3 Bucket
Problems with this approach
It increases the load on your server.
Users first have to wait for the file to be uploaded to the server and then to s3 which takes time.
For large-sized files, there are multiple points of failure which is not desirable.
Option 2. Upload Directly From Frontend
You can directly upload a file to a remote server. This way we have to wait for less time.
Frontend Application -> S3 Bucket
The following article shows how to do that.
How to Upload Files to AWS S3 in React *In 2 different ways*javascript.plainenglish.io
Problems of This Approach
You have to store security tokens directly in your front-end code which is never a good idea.
If your security tokens get exposed it can cost you a lot of money.
Improved Solution: Pre Signed URL Approach
Now we will see how we can all the problems of the previous 2 methods. In this approach, we can use our aws-sdk to generate a pre-signed URL so that we can access the S3 bucket directly without exposing the security tokens.
First we send some information about the object(not the actual file) from the frontend to some kind of backend API (can be a lambda function).
This function takes the information and creates a post API for us.
Then we can use axios or fetch to send the object to the S3 bucket directly from the front-end.
Benefits of this approach
We don’t need to store any kind of secret in the front-end code.
We don’t need to wait to send the actual file to the backend thus reducing response time by 50%!
Step 1. Prepare Backend
Here is the function that you can use to generate the signed URL
import AWS from 'aws-sdk'

AWS.config.update({
    accessKeyId: 'YOUR_ACCESS_KEY_ID',
    secretAccessKey: 'YOUR_SECRET_ACCESS_KEY',
})

const S3_BUCKET ='YOUR_BUCKET_NAME';
const REGION ='YOUR_REGION';
const URL_EXPIRATION_TIME = 60; // in seconds

const myBucket = new AWS.S3({
    params: { Bucket: S3_BUCKET},
    region: REGION,
})

function generatePreSignedPutUrl( fileName , fileType) {
    myBucket.getSignedUrl('putObject', {
        Key: fileName,
        ContentType: fileType,
        Expires: URL_EXPIRATION_TIME
    } , (err , url) => {
        return url // API Response Here
    });
}
You can keep this function in a lambda or your own backend.
Step 2. Use In Frontend
In your front-end, you just call this API or Lambda and get the URL back then make a simple PUT request to the endpoint you provided.
The payload have to be your actual file not some kind of multipart data.
Here is a simple React component that does this
import React ,{useState} from 'react';

const UploadImageToS3 = () => {

    const [selectedFile, setSelectedFile] = useState(null);

    const handleFileInput = (e) => setSelectedFile(e.target.files[0]);

    const uploadFile = (file) => {

        const requestObject = {
            method:'POST' ,
            body:{
                fileName: file.name ,
                fileType: file.type
            }
        }

        fetch('YOUR_BACKEND_ENDPOINT',requestObject)
            .then(res => {
            fetch(res.signedUrl , {
                method:'PUT',
                body :file
            }).then((res) => {
                // DO WHATEVER YOU WANT
            })
        })

    }


    return <>
        <input type="file" onChange={handleFileInput}/>
        <button onClick={() => uploadFile(selectedFile)}> Upload to S3</button>
    </>
}

export default UploadImageToS3;
This component can be used to upload files to an s3 bucket securely.
Get Object Securely
We have seen how we can securely upload files via a pre-signed URL. What about downloading?
Well, here we can use this pre-signed URL approach once again! Now instead of putObject type URL what we need is getObject type pre-signed URL. We can achieve that using the following function.
function generatePreSignedGetUrl( fileName , fileType) {
    myBucket.getSignedUrl('getObject', {
        Key: fileName,
        ContentType: fileType,
        Expires: URL_EXPIRATION_TIME
    } , (err , url) => {
        return url // API Response Here
    });
}
Now, whenever our users need to see some image, we will show them that image with the pre-signed URL instead of the actual URL.
That’s it! I hope this article sheds some light on how to securely access the S3 bucket for uploading and downloading data.
Have a Great Day!
Have something to say?
Get in touch with me via LinkedIn