How to Setup and Add Google Analytics to your React App
In the current information age, every successful business needs to know about its customers and what they care about the most. and the easiest way of doing this is to track them when they visit your website.
Their interaction with your site can give you a much better insight into what they are looking for and helps you optimize user experience even more.
Fortunately, Google has made it easy to gain insights into your web application.
What can you do with analytics?
You can gain insight into the region they live in.
You can understand which age group are more interested in your business
Track how much time they are spending on average
Track new user acquisition rate
Track your revenue
Benefits for you as a developer
You can track if there is any bug in your application
You can optimize based on users' interest
And much more….
So no matter how small you are as a developer or business, you should integrate analytics into your website because it’s free and easy to set up.
Step 1. Create an Account
Go to analytics.google.com
If you already have a Google account(Which you might have), you just have to set up a new account and give it a name.
Step 2. Create a Property
Property is a way for Google to track your website. We need to create a new property for our website.
Go to your dashboard and find
Admin->Create New PropertyFill up the required name and other details and provide the URL of your website. > Be sure to click on the Advanced Settings and turn on the Create Universal Property option. By default, google will not create a universal property.
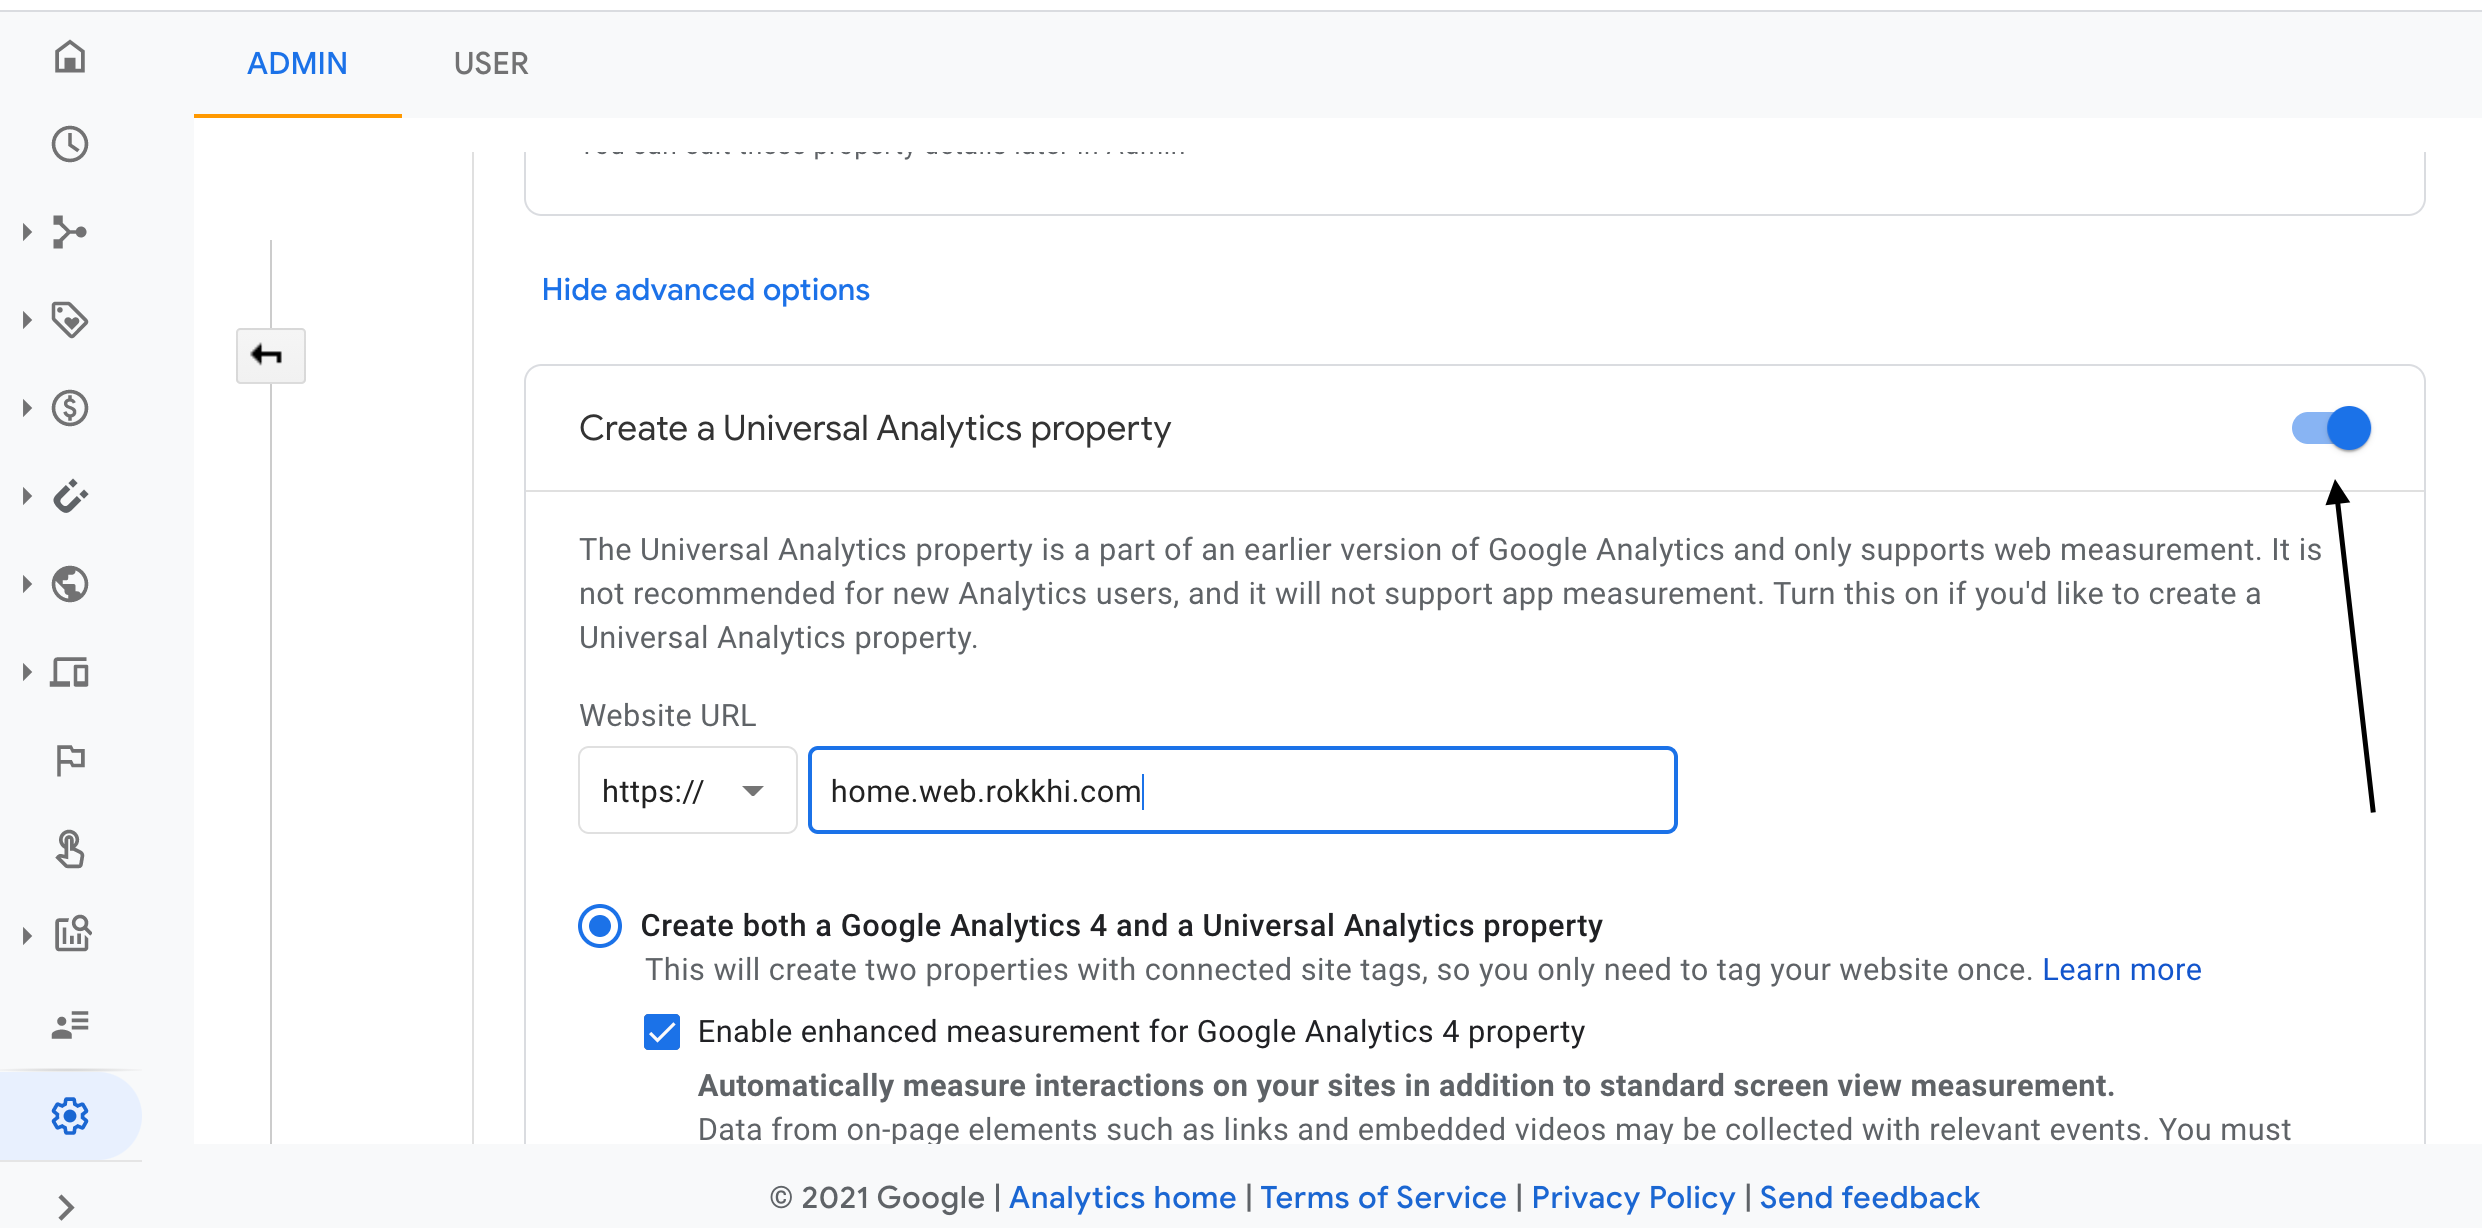
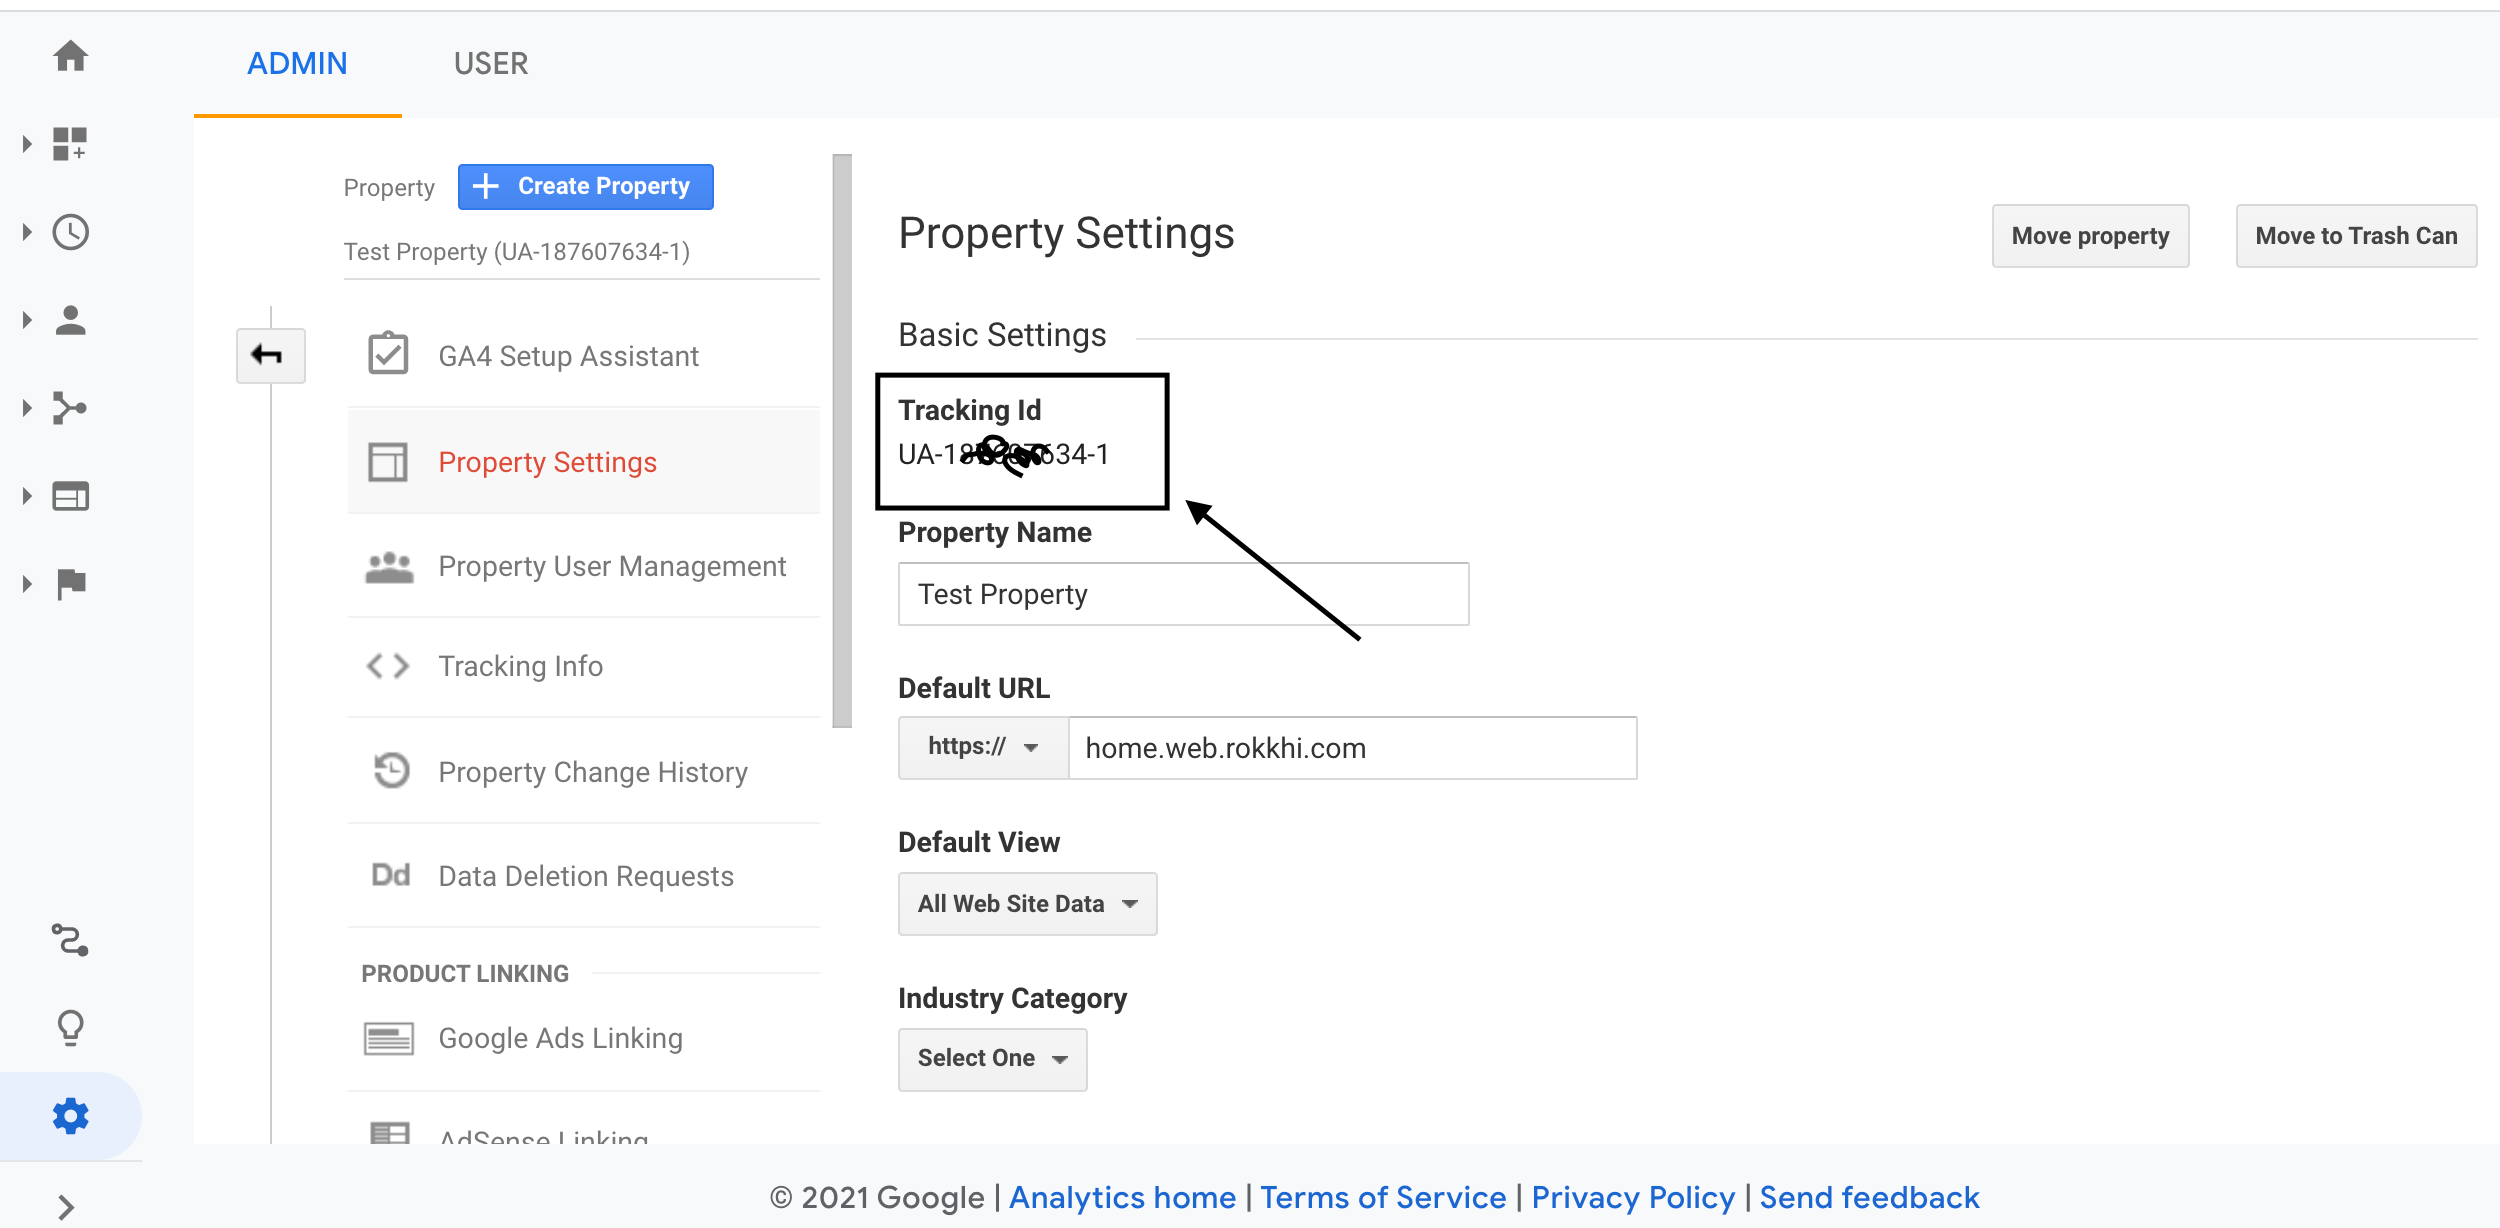
- Then Select a property and get the tracking id and save it somewhere.
Now you are done setting up your project in Google Analytics. If you have a live website, you will start getting some insights about the visitors already. > Up to this part, we didn’t do anything specific to React. These can be done for any live website!
But we want more than that. We want to track the user's exact journey. We want to know more about the interactions between our website and users. For that, we need to set up google analytics for our project.
Step 3. Install Dependencies
First, install react-ga package from npm. It’s the official npm package for React integration with Google Analytics.
yarn add react-gaor
npm i react-ga -SStep 4. Setup Analytics Inside Project
Setup Google Analytics inside Your Project. You should do it inside App.js or index.js . From react-ga documentation
> GA must be initialized using this function before any of the other tracking functions will record any data.
So add the following code to your App.js file
import ReactGA from 'react-ga';

const TRACKING_ID = "UA-12341234-1"; // YOUR_OWN_TRACKING_ID
ReactGA.initialize(TRACKING_ID);
Step 5. Record Custom Events
Now you have so many options to play with. You can do that if you want to track how many times your users have clicked on a particular button or performed a particular action.
To track the user creation event, you can call the following function when a user creates an account.
ReactGA.event({
  category: 'User',
  action: 'Created an Account'
});
To catch exceptions,
ReactGA.exception({
  description: 'An error ocurred',
  fatal: true
});
You can do much more than these. Check out more from here.
Step 6. Integration With React Router
Most of the time, we want to know which pages our users visit more. But unfortunately, it’s hard to track with a CSR (Client Side Rendering) library like React. Because React loads only one HTML file.
But there is a workaround. For routing in react, we mostly use react-router-dom and this library provides us with a HOC to track the URL change.
So we can send the URL change data to google analytics to track which pages our users visit more often than others.
We can create a RouteChangeTracker component to listen to the changes in the route and send data back to Google Analytics
    import React from 'react'

    import { withRouter } from 'react-router-dom';
    import ReactGA from 'react-ga';

    const RouteChangeTracker = ({ history }) => {

        history.listen((location, action) => {
            ReactGA.set({ page: location.pathname });
            ReactGA.pageview(location.pathname);
        });

        return <div></div>;
    };

    export default withRouter(RouteChangeTracker);
Don't forget to add the RouteChangeTracker component inside your App.js file.
    import RouteChangeTracker from './RouteChangeTracker'

    export const App = () => {

      //other logics goes here

      return <div>
        <RouteChangeTracker />
      </div>

    }
Now you are all set. You should see how users interact with your application in your analytics dashboard.
That’s it for today. Happy Coding! :D
Get in touch with me via LinkedIn