How to Setup AWS Authentication for React Applications
Authentication is one of the first aspects of any modern web application that you need to take care of as a developer. Fortunately, today we have so many great solutions and one of them is AWS Amplify.
Today we will use this service to create a simple React application. Our objective is to
Install and Configure Amplify CLI on Our Machine
Create A Basic React Project
Add User Authentication to it
Deploy it Into the Cloud
Let’s get started.
What is AWS Amplify?
AWS Amplify is a service that is managed by AWS itself. It takes care of most of the common functionalities of a modern application like Auth, Hosting, API, etc so that you can focus on building the actual product yourself.
Step 1. Install Amplify on Your Machine
Run the following command to install amplify on your machine
npm i -g [@aws](http://twitter.com/aws)-amplify/cliStep 2. Configure Amplify
After installation run the following command to configure amplify
amplify configureThese 2 steps are only one time. In this step you will need aws secret access key and aws access key id . Both of these you can find in your aws profile’s IAM settings.
Step 3. Create a New React Project
First, create a brand new project for our purpose
npx create-react-app learning-amplifyStep 4. Configure amplify for project
Go inside the project's root directory.
cd learning-amplifyThen configure a amplify project by running the following command
amplify initThis will take you through a standard procedure. Most of the options you can leave as default. Here is an example
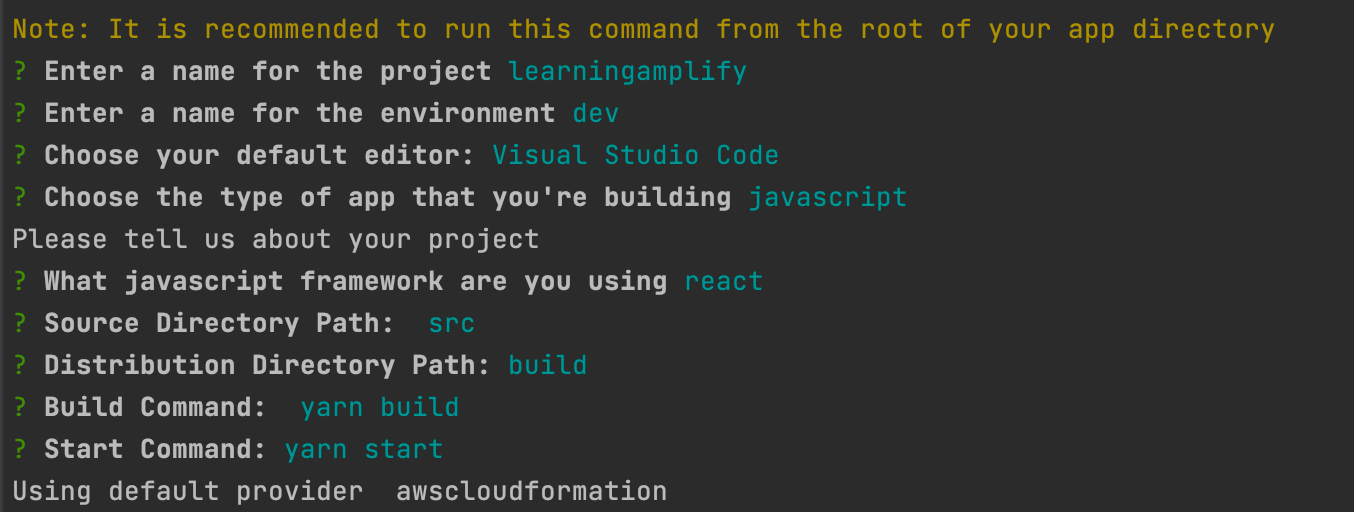
It will create an amplify directory inside your project. Don’t touch that.
Step 5. Add Authentication
Now we have recognized this project as an Amplify project. Now what we need to do is add authentication to this project.
amplify add authIn this step, you will have to configure how you would your users to sign in. There are a bunch of options
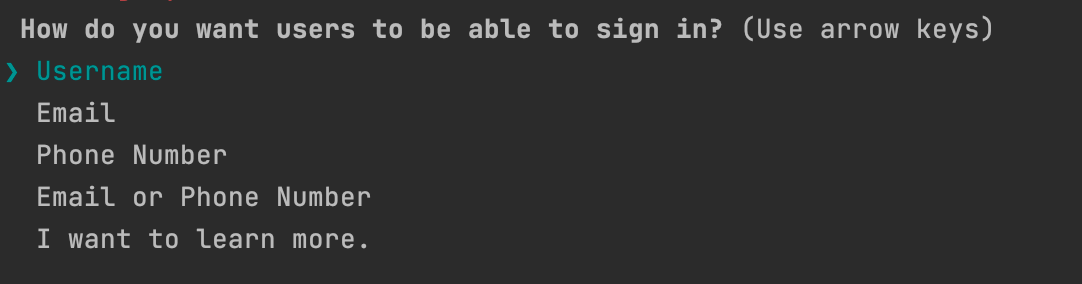
Choose what you want. We are going with Username for now.
Leave everything else as default and you will be set up within minutes.
Step 6. Push Everything Into Cloud
Now we need to put our project on the cloud. To do that run the following command
amplify pushIt will take some time. But after that, you are all set up.
Step 7. Use Amplify SDK Inside Project
It will handle all our UI and sync with aws. First, install it
yarn add aws-amplify You will need to configure your project at the root level (In our case that is index.js file). Add the following 3 lines of code inside your index.js file
import Amplify from "aws-amplify";
import awsExports from "./aws-exports";
Amplify.configure(awsExports);
After that our index.js will look something like this
import React from 'react';
import ReactDOM from 'react-dom';
import './index.css';
import App from './App';

import Amplify from "aws-amplify";
import awsExports from "./aws-exports";
Amplify.configure(awsExports);

ReactDOM.render(
  <React.StrictMode>
    <App />
  </React.StrictMode>,
  document.getElementById('root')
);
Now we can handle authentication ourselves. Here is the documentation for all the available functions.
Step 8. Make it Even Better
There is an awesome library named @aws-amplify/ui-react which takes care of the most common authentication flows for us automatically. It includes
Sign In
Sign Out
Reset Password
And many other things. To take advantage of the authentication library we have to install the package first
yarn add @aws-amplify/ui-reactNow inside our App.js we need to import a higher-order function and wrap our App Component with this.
Finally, it will look something like this.
import { withAuthenticator , AmplifySignOut } from '@aws-amplify/ui-react'

function App() {
  return (
    <div>
      Our amplify application
      <AmplifySignOut />
    </div>
  );
}

export default withAuthenticator(App);
Notice we also added a Signout button for our application.
Step 9. Run The Application
Now start the app as usual
yarn startAnd you will be greeted by the login UI provided by the Amplify Ui React!
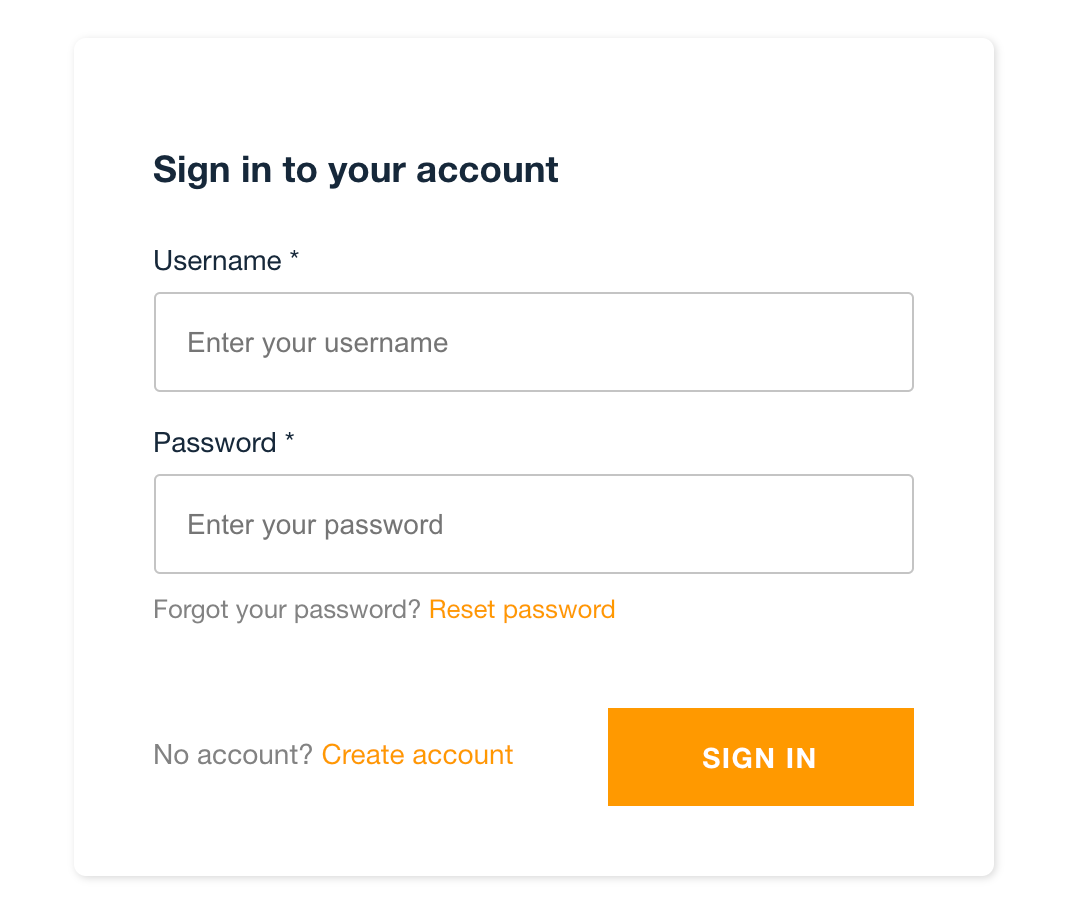
From here you can create a new account and then sign in.
Step 10. Publish Your Application
Okay Great! Now it’s time to share your achievements with the world. Just go to the terminal and run the following command.
amplify hosting addIt will prompt where you would want to host your application.

We are choosing Amplify console so that we don’t need to do anything!
Then run the following command to put everything into the cloud!
amplify publishThis will take some time and after that, you will be greeted by this

Awesome! Now visit the URL and see your application live!
That’s it. Now you know how to build an end-to-end product using AWS Amplify. Explore more to find out what other things you can do with this. Thank you for reading!
Resources:
Get in touch with me via LinkedIn