Handle Push Notifications in React
Notifications are an important part of a good user experience. You can keep your users updated about your product and offers by using notification properly.
Today we will see how we can receive notifications in our ReactJS web application. I assume you already have a basic react application to follow along. We will use firebase for the notification part.
Step 1. Install Firebase
You should install the required dependencies
yarn add firebaseNow go to your firebase console -> create a project -> grab your firebase project configuration details. You can learn more from here
Step 2. Add Service Worker to Project
To receive notification we need to have a service worker in our application.
A service worker is a script that your browser runs in the background, separate from a web page, opening the door to features that don't need a web page or user interaction.
As we want to receive a notification without any user interaction we need to have a Service Worker. To create one . . .
Go inside your public folder (the folder with index.html file in it)
Create a new file named firebase-messaging-sw.js
Add the following code and replace the value of the config object with your configuration values
importScripts('https://www.gstatic.com/firebasejs/7.14.2/firebase-app.js')
importScripts('https://www.gstatic.com/firebasejs/7.14.2/firebase-messaging.js')

const config = {
  apiKey: "API_KEY",
  authDomain: "PROJECT_ID.firebaseapp.com",
  databaseURL: "https://PROJECT_ID.firebaseio.com",
  projectId: "PROJECT_ID",
  storageBucket: "PROJECT_ID.appspot.com",
  messagingSenderId: "SENDER_ID",
  appId: "APP_ID",
  measurementId: "G-MEASUREMENT_ID"
}

firebase.initializeApp(config)
const messaging = firebase.messaging()

// IF WE WANT TO HANDLE BACKGROUND NOTIFICATION WE HAVE TO ADD THE FOLLOWING BLOCK OF CODE AS WELL

messaging.setBackgroundMessageHandler(function (payload) {

    console.log('[firebase-messaging-sw.js] Received background message ', payload)

    const notificationTitle = payload.data.title
    const notificationOptions = {
        body: payload.data.body,
        icon: '/firebase-logo.png'
    }

    return self.registration.showNotification(notificationTitle, notificationOptions)
})

self.addEventListener('notificationclick', (event) => {
    console.log(event)
    return event
})
Step 3. Register Service Worker
Inside App.js ( or any other component/hook) add the following code right before rendering the application. It will register the service worker to Handle Background Notification.
export default function App () {
if ('serviceWorker' in navigator) {
navigator.serviceWorker
.register('firebase-messaging-sw.js')
.then(function(registration) {
console.log('[SW]: SCOPE: ', registration.scope);
return registration.scope;
})
.catch(function(err) {
return err;
});
}
return <div> </div>
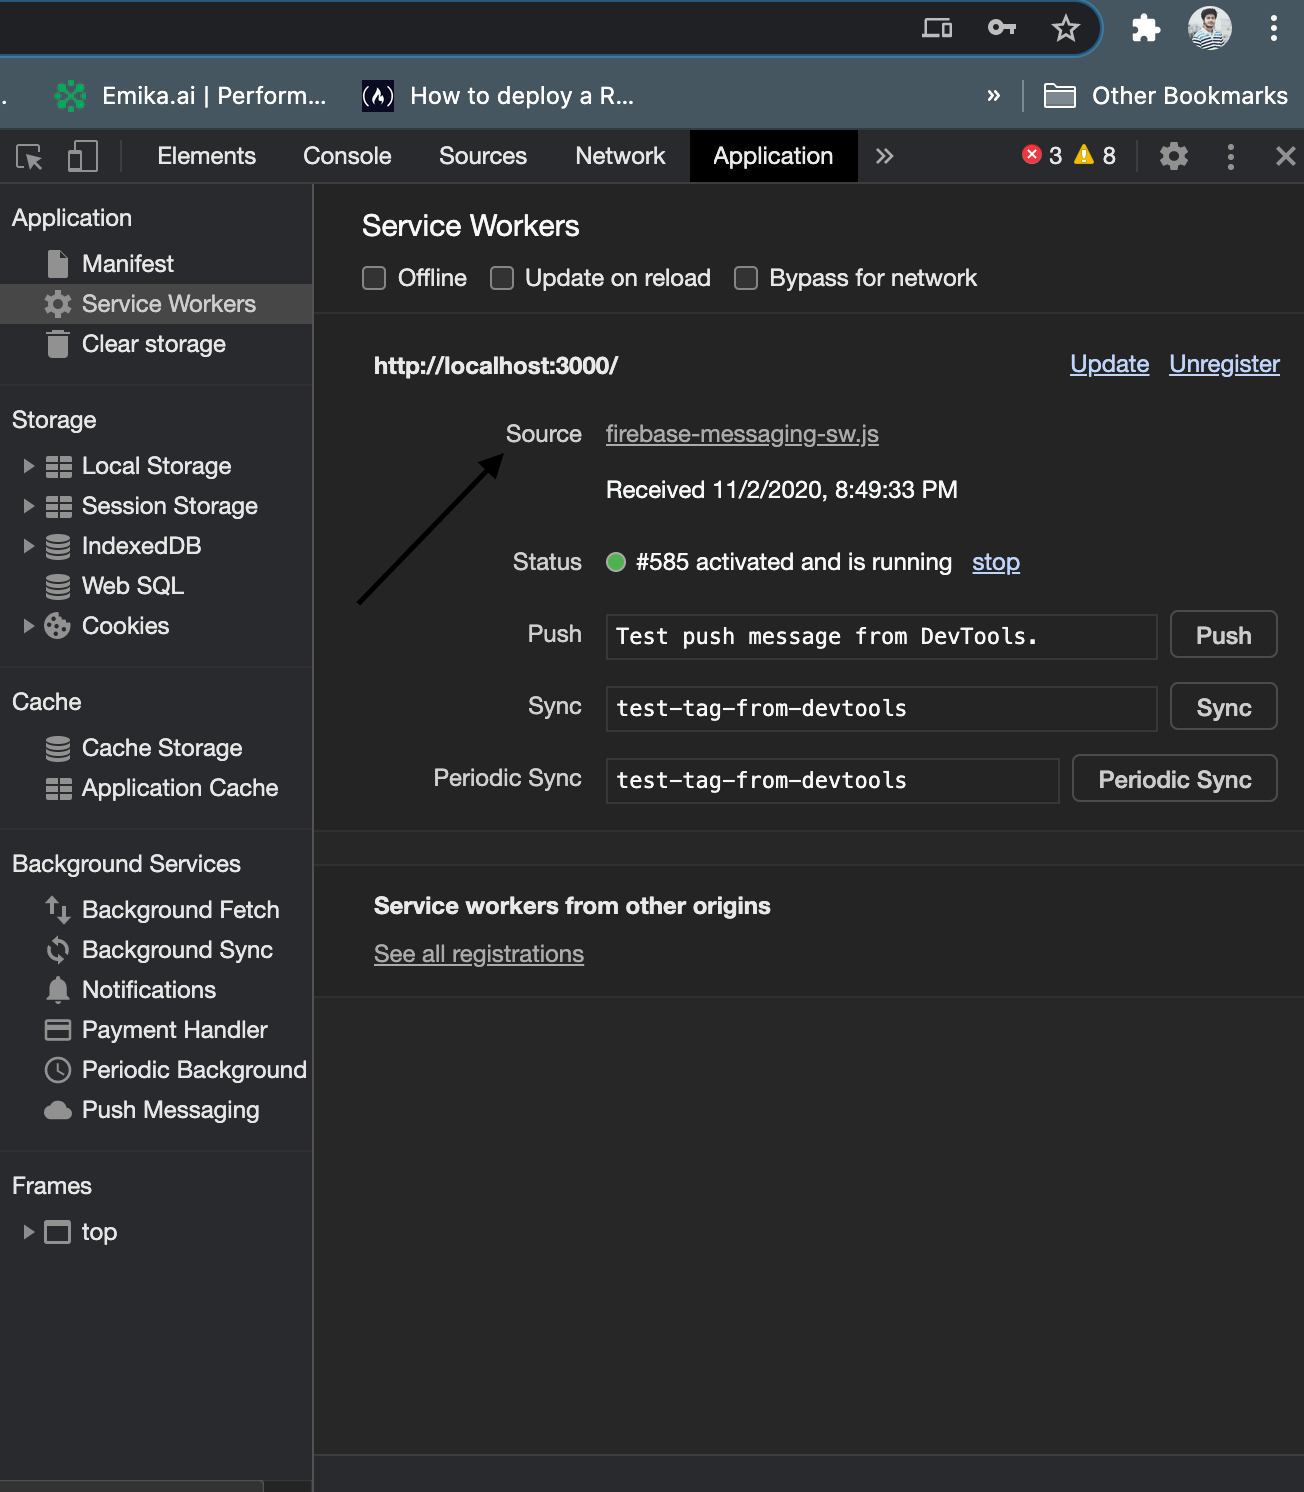
}After running the application you can go to your dev tools from the browser and under application > Service Workers to see if the service worker is activated or not.
Step 4. Add Utility Functions
Now we are ready to receive notification in the browser. But we need 2more things.
Permission from the user if he wants to view notification or not
Device token to identify our device (we have to save it somewhere)
Now inside your App.js file add the following code to get the user permission and device token
import React from 'react';
import firebase from 'firebase';

export default function App () {

  /// ... registration of service worker


  useEffect(() => {
    firebase
    .messaging()
    .requestPermission()
    .then(() => firebase.messaging().getToken())
    .then((deviceToken) => {
      console.log(deviceToken)      // save this token somewhere
    })
    .catch((err) => {console.log(err)})
  },[])


  return <div> App </div>

}
But if you like to keep your code clean you can create a custom hook with all the necessary logic for notification named useFirebaseNotification.js which will be something like this . . .
import firebase from 'firebase'
export const useFirebaseNotificationProvider = () => {
    if ('serviceWorker' in navigator) {
        navigator.serviceWorker
            .register('./firebase-messaging-sw.js')
            .then(function (registration) {
                console.log('Registration successful, scope is:', registration.scope)
            })
            .catch(function (err) {
                console.log('Service worker registration failed, error:', err)
            })
    }

    firebase
        .messaging()
        .requestPermission()
        .then(() => firebase.messaging().getToken())
        .then((firebaseToken) => {
            console.log(firebaseToken)
        })
        .catch((err) => {
            console.log(err)
        })

    firebase.messaging().onMessage((payload) => {
        console.log('payload is ', payload)
    })
}
This hook will register your service worker and ask for permission and get the device token for you.
call this hook from your App.js
export default function App () {
  useFirebaseNotification()
  return <div> App </div>
}
Much cleaner right?
Step 5. Send Notification from Backend
We are all set for receiving notifications in our frontend. We will get a notification whether our app is in the foreground or not.
If you have a backend application form where you can handle notifications you can grab the device token from earlier and send a notification.
Or you can send notifications from your firebase console also.
From your backend (Which should also be connected to firebase but out of scope for this tutorial ) you can use the following code to send notifications. from NodeJS
import admin from 'firebase-admin';

const payload = {
    title: 'title',
    body: 'body',
    data: {
        title: 'title',
        body: 'body'
    },
    tokens: [DEVICE_TOKEN]
};

function sendNotificaiton() {
  admin
    .messaging()
    .sendMulticast(payloadWeb)
    .then(response => {
        console.log(response.responses);
    });
}

sendNotificaiton();
Hopefully, you can see the notification in your browser. You can do all kinds of custom stuff after receiving the notification now.
That’s it for today. I hope you have found this helpful. Have a great day!
Get in touch with me via LinkedIn